This page shares practical bikepacking camera mount lessons inspired by a forum mention of the Porcelain Rocket Slinger. Not affiliated with or endorsed by any parties mentioned.
Bikepacking Camera Mount Lessons: Porcelain Rocket Slinger
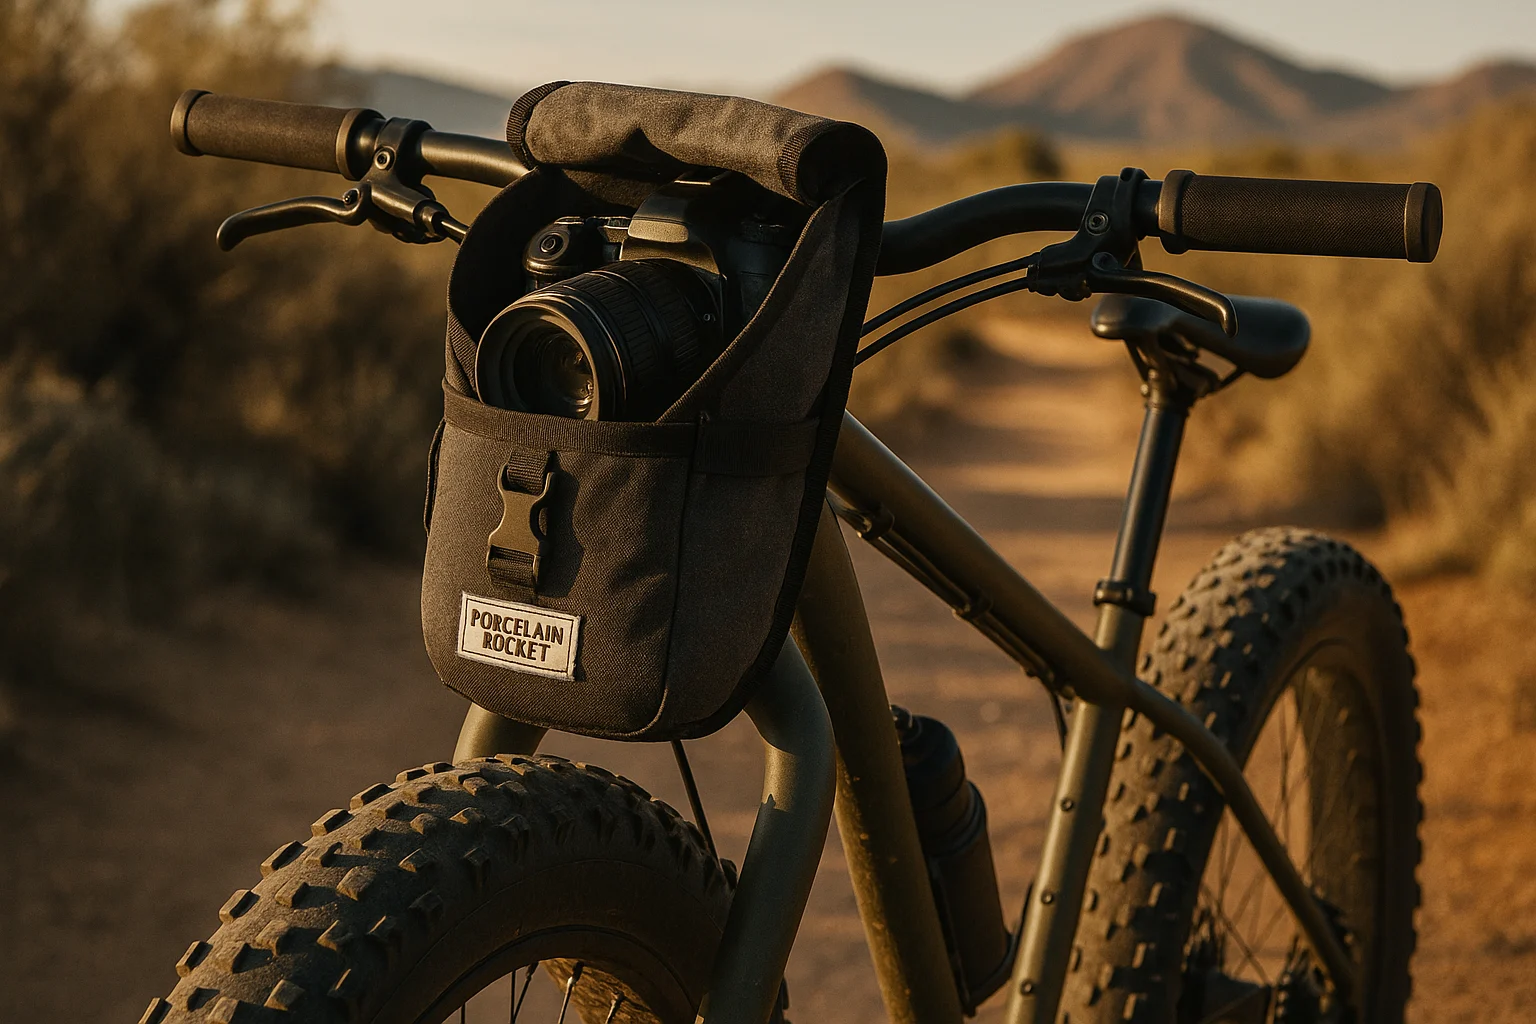
Lightweight camera handlebar mounts keep gear secure and accessible on rugged trails without adding bulk. This page summarizes key takeaways from a documented Slinger setup — design, stability, and use — with practical tips for bikepacking photography. The mount was mentioned in Bearbones Bikepacking forum.
Mount Overview
Handlebar camera mounts like the Porcelain Rocket Slinger (around 8 oz) provide quick access and stability for SLR/mirrorless cameras on gravel and singletrack. This kind of gear balances protection with reach — ideal for capturing shots without stopping.
Gear Choices
Compact, durable mounts with padded interiors and secure straps keep cameras safe from vibration and weather. Minimalist design reduces weight — habits that improve handling on long rides. More gear ideas in our bikepacking gear guide.
Use Lessons
Quick-release systems allow fast grabs for spontaneous shots, while stable mounting prevents damage on descents. These features support dynamic photography — skills that transfer to any bikepacking trip where access and protection matter.
Key Tips for Bikepacking Camera Mounts
- Choose lightweight padded designs — protect without bulk.
- Use quick-access straps — grab camera without stopping.
- Test on rough terrain first — ensure stability.
- Pair with weather-resistant cases — extra protection in rain.
- Balance handlebar load — avoid steering issues.
Next Steps & Guides
Ready to apply these camera mount lessons? Explore more practical setups in our bikepacking gear guides.