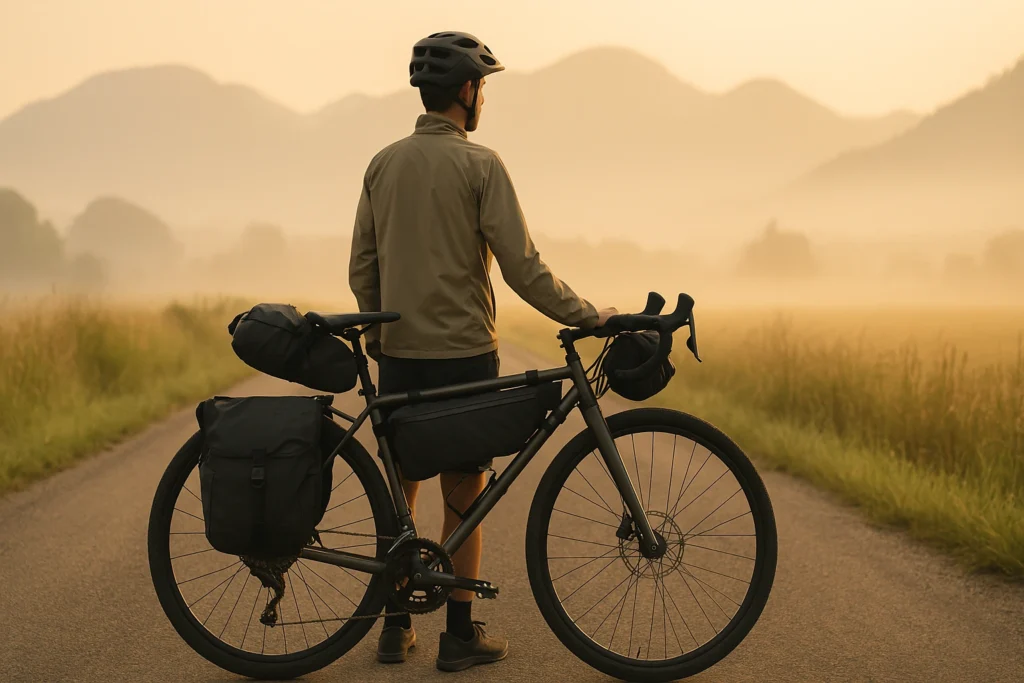
This beginner bikepacking guide is built around one night out — a short route, gear you mostly already own, and a plan simple enough that nothing has to go perfectly. You don’t need a lighter bike, more fitness, or another winter of research.
Expect some fumbling. A strap you re-tie twice, dinner that takes longer than it should, one moment at dusk where you quietly wonder what you’ve gotten yourself into. That is the trip working, not failing. You sleep, you make coffee, you ride home — and you’re a bikepacker.
Last updated: July 2026
Start here: Choose an easy route (plan your overnight), pack the essentials (use the checklist tool), then do a 10-minute shakedown ride close to home to catch rattles, rubbing bags, and reach-to-snack/water issues before trip day.
Open the Essentials ChecklistThis page contains affiliate links and may include sponsored content. As an Amazon Associate, I earn from qualifying purchases at no extra cost to you. Amazon links are labeled #ad; other affiliate links may be marked as “affiliate link,” “Sponsored,” or “(paid link).” Learn more.
Table of Contents
- What Is Bikepacking?
- Why Choose Bikepacking? Benefits for Beginners
- How to Plan Your First Bikepacking Trip
- Pack Smart for Your First Overnighter
- Riding Tips for First-Time Bikepacking
- Common Mistakes to Avoid
- Safety Tips for First-Time Bikepackers
- Frequently Asked Questions
- Next Steps
What Is Bikepacking?
Bikepacking is like backpacking, but you swap hiking boots for a bike. Your gear fits into compact bags attached to your frame, so you can pedal farther and explore quieter trails or back roads.
If you’re new, think of this as bikepacking for beginners: simple routes, simple gear, and a calm first overnight. If you’ve ever stared at a trailhead sign and thought, “Could I actually camp out there on a bike?”—you’re exactly who this is for.
Bike touring is usually more road-focused and often uses panniers, while bikepacking uses smaller, tighter bags that stay steadier on rougher terrain.
Reality check: Decide what “success” means for night one. “I slept okay” beats “I rode far.” Pick a simple win.
Why Choose Bikepacking? Benefits for Beginners
Bikepacking sticks because it’s simple: you ride, you stop somewhere beautiful, you wake up and do it again. On your first trip, you might fumble a strap or second-guess your packing—then laugh about it at camp once everything settles down.
- Freedom: You set the pace and choose the vibe—easy gravel, quiet roads, or smooth rail trails.
- Adventure without a huge leap: One overnight can feel like a reset, even close to home.
- Confidence: Each small trip teaches you what matters (and what doesn’t).
If you want a bigger-picture story before you plan your first overnighter, here’s what I learned from a 1,200-mile desert trip: Bikepacking the Western US: Lessons Learned.
You’ll also get a solid workout and a lighter-footprint way to travel—especially when you keep your route realistic and your camp low-impact.
Try this: Pick one reason you’re doing this (views, fitness, unplugging). That “why” helps when you’re tired and tempted to quit early.
How to Plan Your First Bikepacking Trip
Planning is what turns nerves into excitement. Start with a short, low-stress overnight so you can learn what works (and what rattles) before you go bigger.
Before you commit to a route, confirm these six things. If any one of them is still a guess, that is the part of the plan to fix first:
- Realistic mileage: Plan well under the distance you ride unloaded. Gear slows you down and makes every climb harder, and trip one is not the day to find your limit.
- Manageable climbing: Elevation punishes a loaded bike far more than flat miles do.
- Legal camping: Know exactly where you are allowed to sleep before you leave.
- Reliable water: Identify your refill points, and the longest gap between them.
- Enough daylight: Plan to reach camp at least two hours before sunset.
- One bailout option: A road, a town, or a person who can collect you if the day falls apart.
Choosing a Beginner-Friendly Route
The right route is the difference between “I want to do this again” and “never again.” Keep it friendly: steady surfaces, predictable mileage, and an easy bailout if you change your mind.
- Distance: Roughly 20–30 miles a day works for many new riders.
- Terrain: Flat or gently rolling keeps the day calm.
- Surface: Smooth gravel or pavement is easier with a loaded bike.
- Stops: Know where you’ll refill water and grab food.
- Safety: Avoid high-traffic roads and check closures and weather.
Looking for ideas? Pop over to Bikepacking.com for route inspiration.
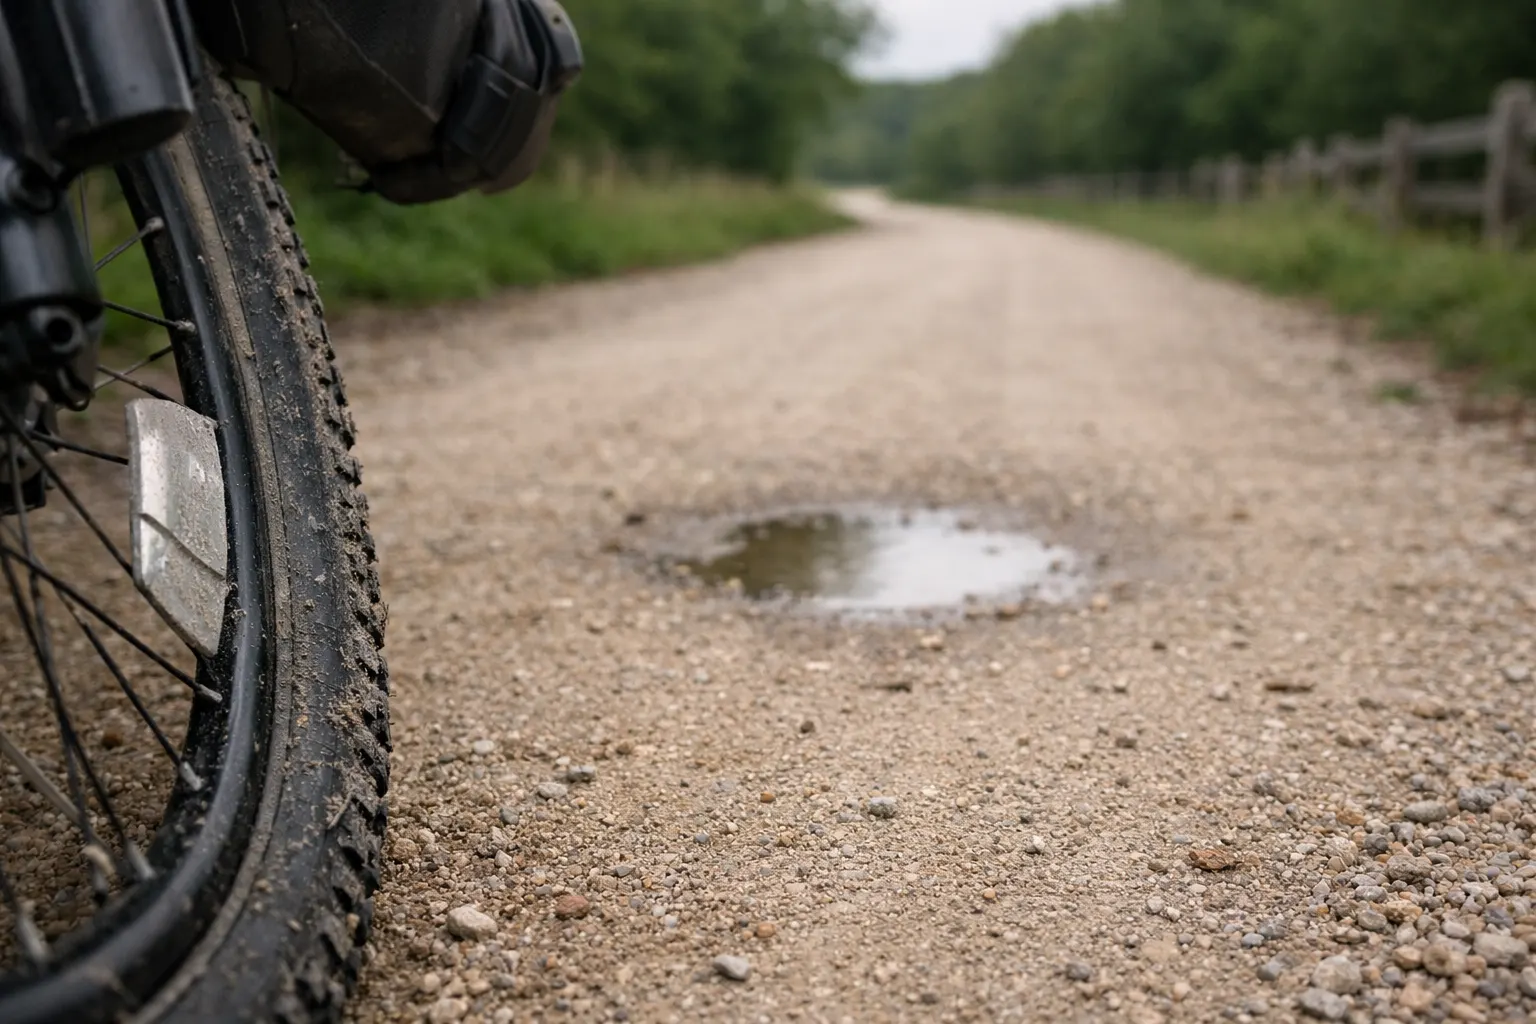
Know the Rules & Leave No Trace
One of the most stressful beginner moments is rolling in near dusk… and realizing camping isn’t allowed where you planned to stop.
Before you commit, check the official rules for the land you’ll ride through (permits, camping zones, water access, and fire restrictions). Then keep your camp low-impact—Leave No Trace’s 7 Principles are a solid, widely used baseline.
Do this now: Save a screenshot of the key rules (camping + fires + closures). When signal drops, you’ll still know what’s allowed.
Planning Your Itinerary
Keep your first schedule boring—in a good way. Build in time for snack stops, photos, and a slower pace with extra weight.
- Day 1: 20–30 miles to a legal campsite, arrive with daylight to spare.
- Day 2: 15–25 miles back, with a relaxed coffee/snack stop.
Beginner Route Examples You Can Copy
If you want something you can plan in 10 minutes, use one of these templates (and adapt it to your area):
- Rail-trail out-and-back: Smooth path to an established campground, then return.
- State park loop: Low-traffic loop with a guaranteed legal campsite.
- Easy gravel connector: Quiet roads between two towns with food/water stops.
Bailout tip: Write down one easy exit option (town, station, friend pickup). It’s calming to know you have an out.
Gear Up for Your Ride
Before you ride, make sure your bike is ready for extra weight. If you’ve ever had a squeak turn into a bigger problem mid-ride, you know how quickly “minor” can ruin the mood.
- Tires: Check wear and set pressure for comfort + grip (a little lower can feel steadier on gravel).
- Brakes: Strong braking matters more with a loaded bike.
- Chain + drivetrain: Clean, lube, and confirm shifting feels crisp.
- Bolts + bags: Tighten everything that might loosen and rattle.
- Wheels: Spin and check for rub or wobble.
For extra confidence, swing by a bike shop for a quick once-over.
Do this now: Put a 4mm/5mm Allen key (or multi-tool) in your pocket and do a quick “touch check” on bottle cages, racks, and bag mounts before you leave.
A Simple 4-Week Training Ramp-Up
You don’t need a huge plan. You just need your body to recognize “this is normal” before day one.
- Week 1: Ride 2–3 times easy. Focus on comfort and bike fit.
- Week 2: Add one longer ride. Practice eating and drinking while rolling.
- Week 3: Ride once with a lightly loaded bike and test your bag setup.
- Week 4: Do a full shakedown ride with your overnight load, then rest the day before your trip.
If you only do one thing: Do a loaded shakedown ride. It reveals problems fast.
For a full 8-week training plan built specifically for your first bikepacking tour, check out Beginner Bikepacking Training Plan: 8-Week Workout to Crush Your First Tour.
Pack Smart: Bikepacking Essentials Checklist for Your First Overnighter
Packing is a balance: bring what keeps you warm, fed, and safe—skip the “just in case” pile.
For night one, aim for three wins: sleep well, fix a flat, and stay dry.
Bike Bags: What Goes Where
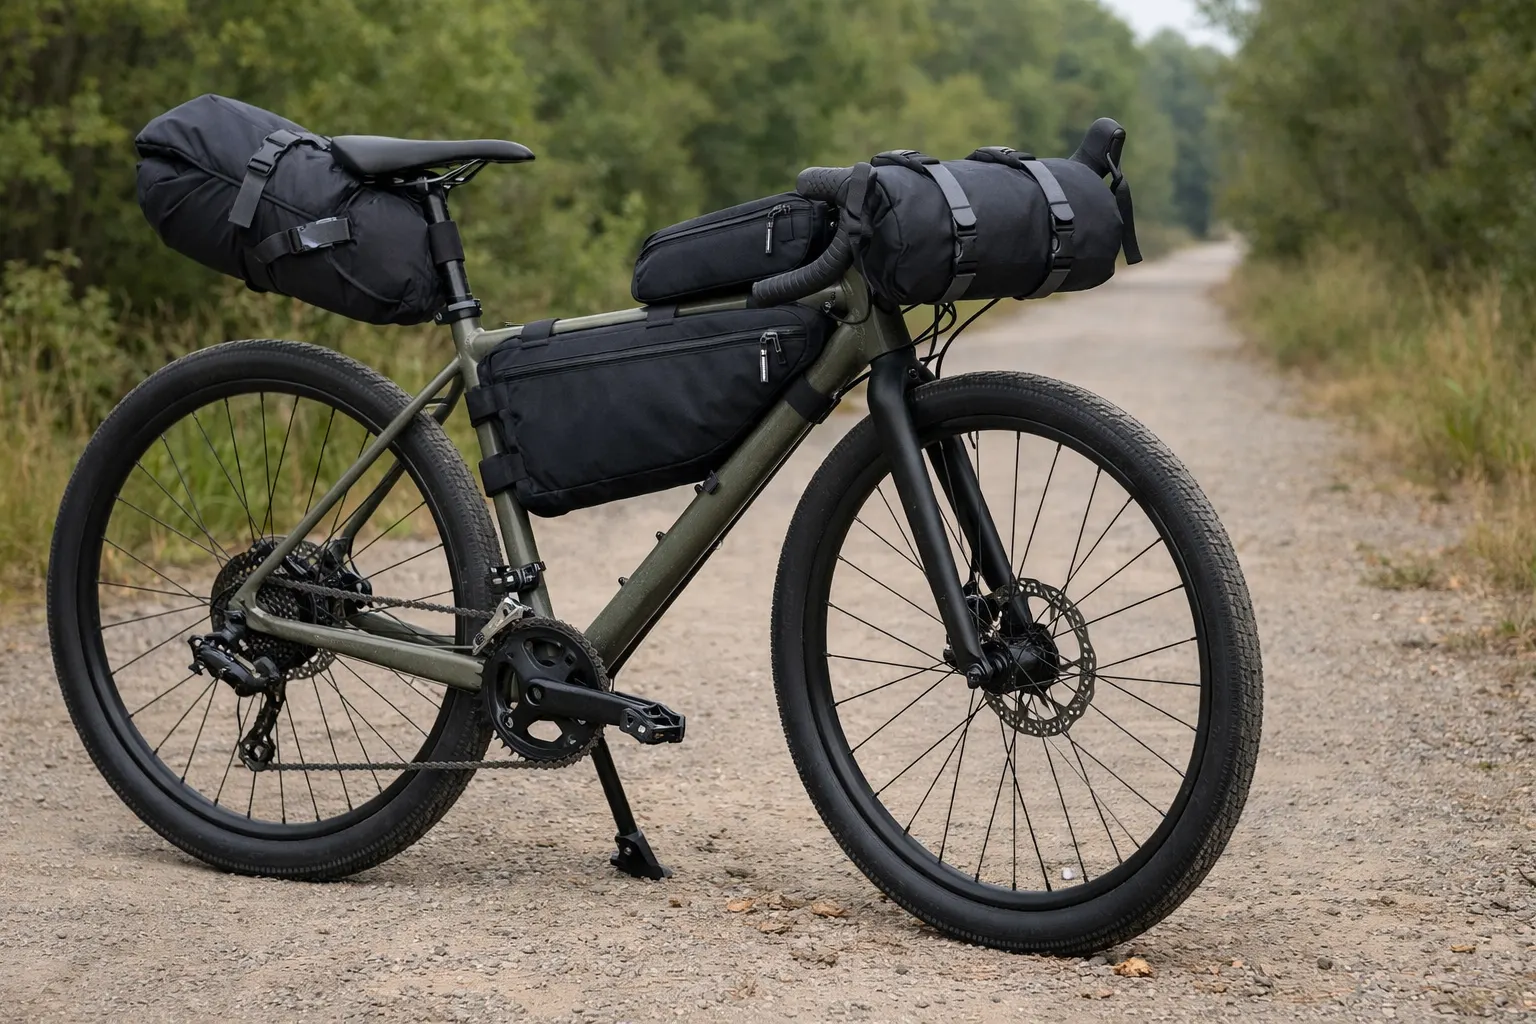
The frame bag carries heavier items (water, tools) inside the triangle for balance. Bulky items like a sleeping bag work well up front. Lighter items like a sleeping pad (or extra layers) ride well in a seat pack. Keep snacks in a top tube bag so you actually eat them.
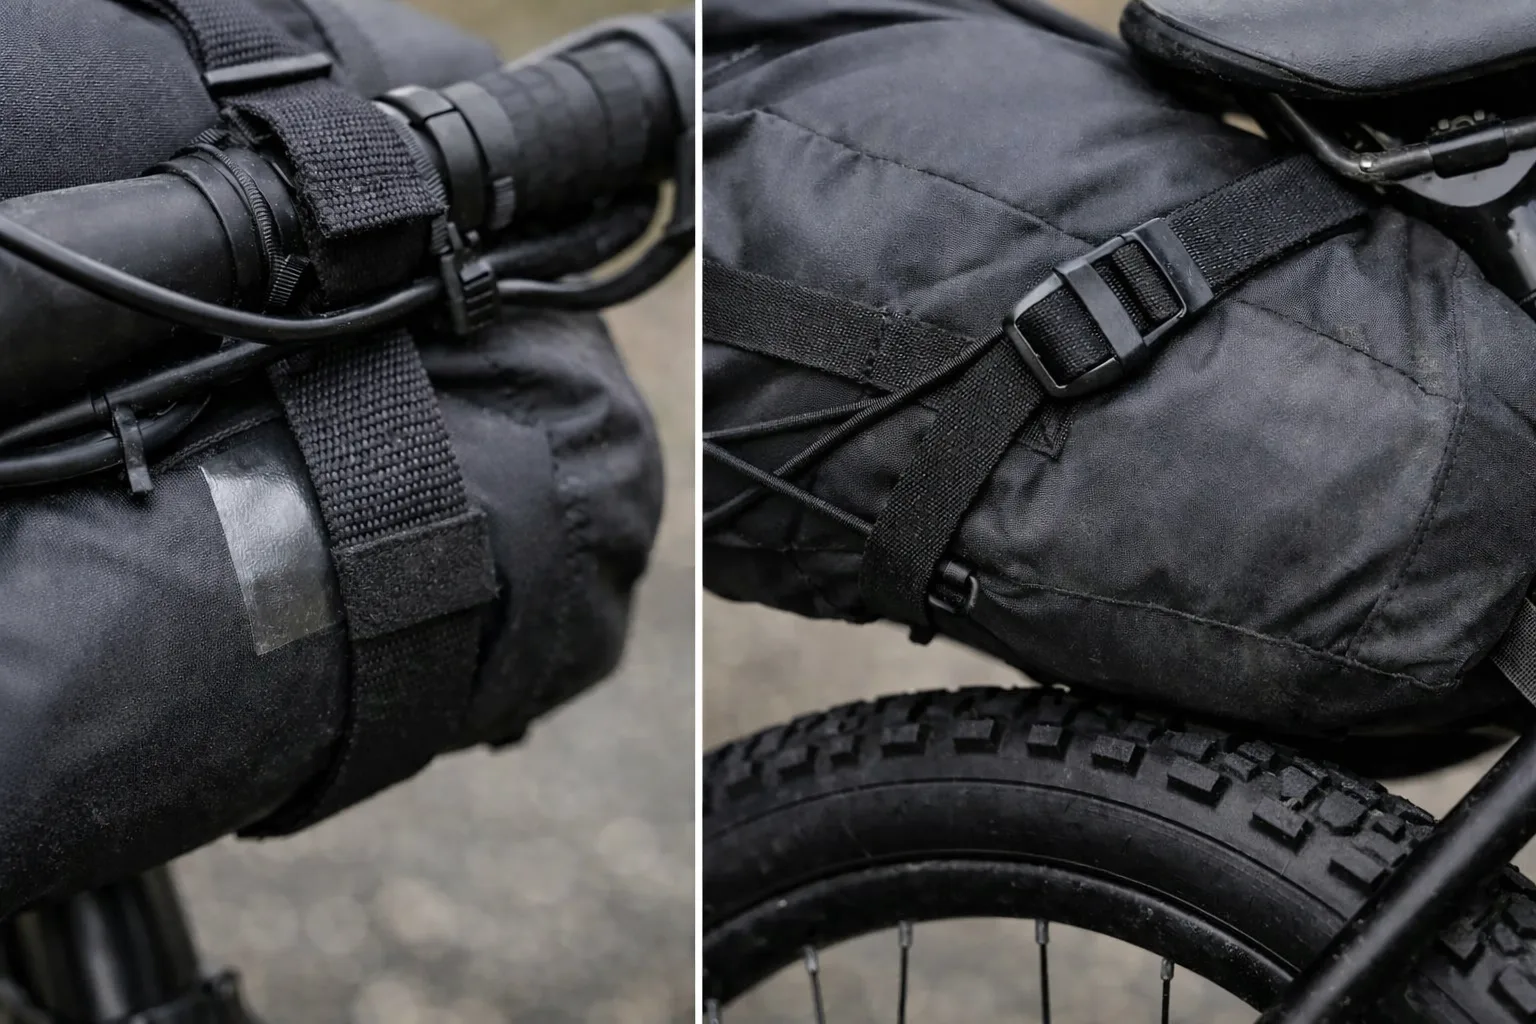
Quick fit check: Make sure the seat pack can’t touch the rear tire when you hit bumps, and the handlebar roll doesn’t rub brake hoses or cables when you turn.
| Bag | Pack This | Beginner tip | Shop |
|---|---|---|---|
| Handlebar roll | Bulky + light (quilt/sleeping bag, puffy) | Leave a small cable gap so hoses don’t get pinched on turns. | |
| Frame bag | Heavy/dense (tools, pump, food, water) | Keep heavy items centered to reduce wobble. | |
| Seat pack | Bulky + light (pad, spare layers) | Strap it tight so it doesn’t sway or kiss the tire on bumps. |
Start with a simple three-bag setup plus a small top-tube bag for snacks. Add extras later only if something genuinely annoys you.
Want the full gear deep-dive with recommendations and buying advice? Head to Bikepacking Gear: Setup Guide and Recommendations.
Shelter Options for Your First Trip
A tent gives the most protection, a bivy is compact for minimalists and handles light wind or drizzle, and a tarp is the lightest option if you’re comfortable with setup and conditions.
Beginner move: Borrow or rent shelter once. Upgrade later based on what actually bothered you (condensation, wind, setup time, or packed size).
Sleep Setup for First-Time Bikepacking
Match your sleeping bag to conditions, bring an insulating pad, and consider a small pillow. If you sleep badly at home, you’ll sleep worse outside—so prioritize comfort here.
A lightweight insulated sleeping-pad option
If your current setup lacks enough ground insulation, compare sleeping pads by R-value, comfort, packed size, and weight. The option below is one established starting point—not a substitute for matching the pad to your expected overnight low.
Lightweight insulated option: Therm-a-Rest NeoAir XLite NXT
The current Regular size is listed at 13 oz with an R-value of 4.5. Verify the size and rating against your expected conditions.
Specifications above are from the current official listing: Therm-a-Rest NeoAir XLite NXT. Weights and R-values change between model revisions, so confirm before buying.
Cooking Gear for Trail Meals
- Stove + fuel: Boil water reliably.
- Pot + spoon: Simple meals, minimal cleanup.
- Food: Easy calories you’ll still want when tired.
Beginner move: For trip #1, choose “easy + enough” (simple boil meals) over “fancy camp cooking.”
Clothing for Your Ride
- Ride kit: Shorts + jersey you already trust.
- Warmth: A light insulating layer for camp.
- Rain/wind: A waterproof shell with real venting.
- Hands/feet: Gloves + solid socks; pack one spare if you run cold.
- Shoes: Shoes you can ride and walk in.
Reality check: If you only pack one “just in case” item, make it rain protection. Getting soaked can turn a fun overnighter into a cold, stressful one fast.
Lightweight rain-shell option: Montbell Versalite
The current men’s Western Size Versalite is a lightweight waterproof shell with pit zips for mechanical venting.
- Current listed weight: 6.8 oz (194 g).
- Pit zips: Useful for releasing heat and moisture while riding.
- Before buying: Check the current size chart and model details because weights and cuts vary.
See the current official listing: Montbell Versalite Jacket Men’s.
Navigation Tools for the Trail
Use a GPS device if you have one, carry a simple paper map as backup, and keep your phone charged for route checks and emergencies.
Tools and Repair Kit for Emergencies
Bring what you need to fix the most common trip-stoppers (especially flats). If you ride tubeless, bring a plug kit and still carry a tube as backup.
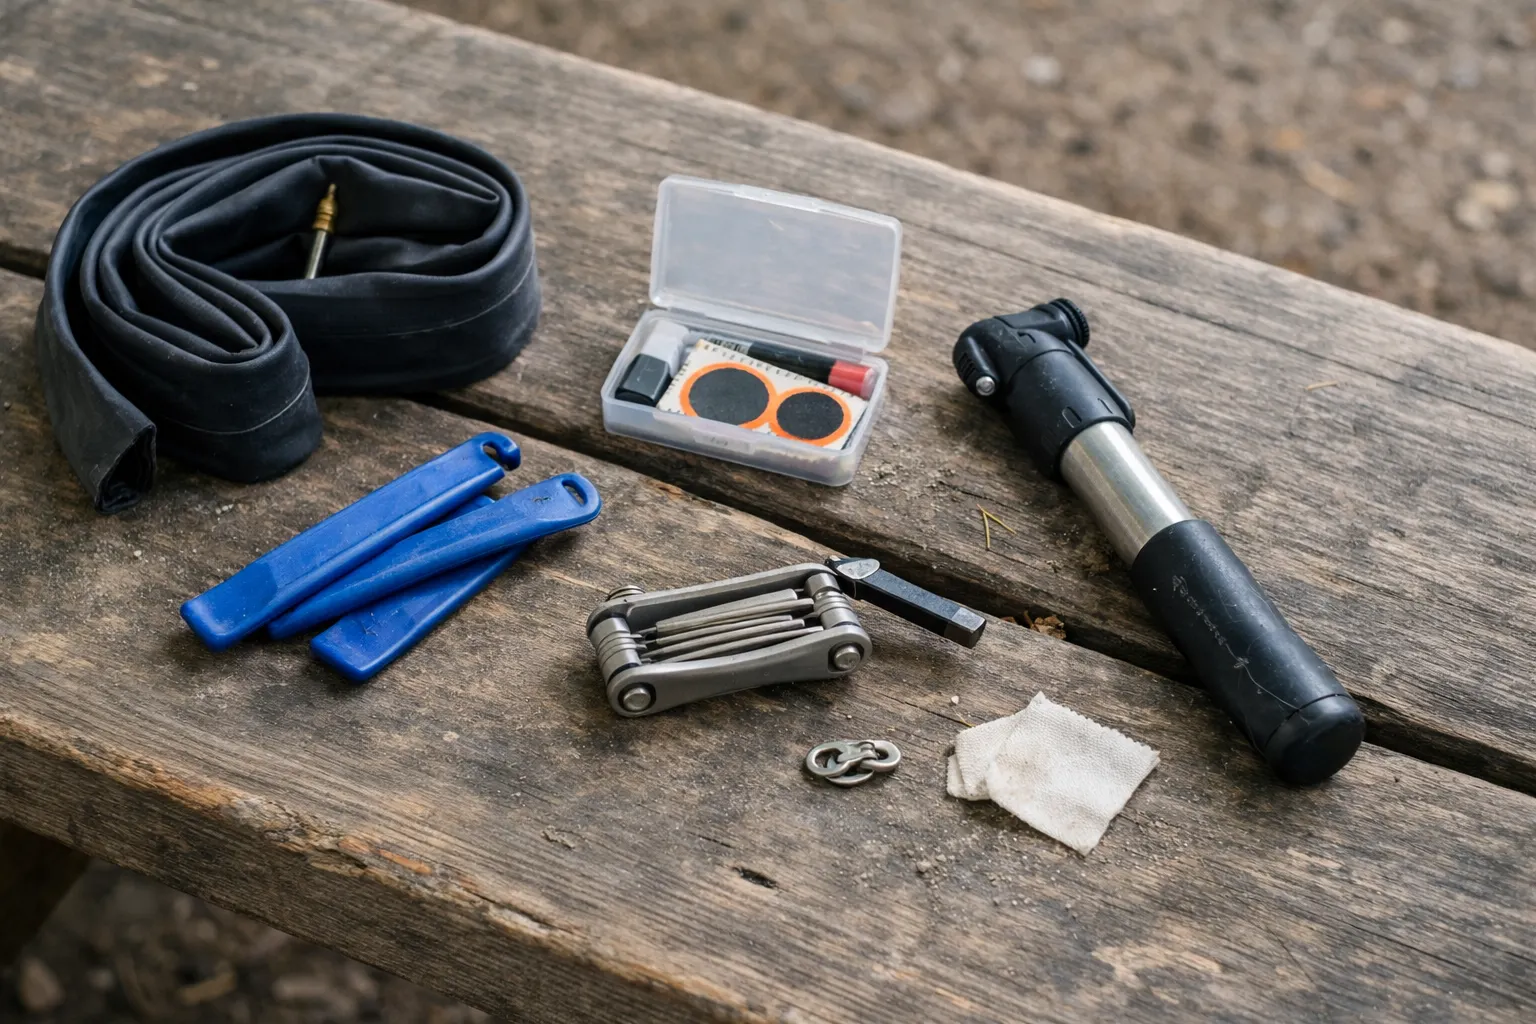
- Multi-tool: Include a chain tool if possible.
- Tire kit: levers + one tube + patch kit (or a couple patches).
- Inflation: a mini pump (simplest on longer rides).
- Chain backup: one quick link that matches your chain speed.
- Quick fixes: a little tape + a few zip ties.
- Tire boot: a small purpose-made boot (or a folded bill/wrapper as an emergency option).
Do this now: Before trip day, practice one flat fix at home (even if you’ve done it before). It makes the first “real” one way less stressful.
Two compact items cover common roadside needs: a multi-tool with a chain tool and a mini pump that works with your valves.
First Aid and Essentials for Your Trip
The Adventure Medical Kits Ultralight/Watertight .3 is a compact kit designed for solo day trips. For an overnight, review its contents and add anything your route, remoteness, or personal needs require.
For camp setup and after-dark repairs, a lightweight rechargeable headlamp with a red mode is a practical choice.
Bikepacking Essentials Checklist
Check each category only when you have a workable plan for it—not merely when you own an item. This bikepacking essentials checklist surfaces the next gap to resolve before your loaded shakedown ride.
Progress
0/10
Status: Plan needs attention
Start with the highest-priority missing check, then work through the rest before your shakedown ride.
Item-Level Packing List for Your First Bikepacking Trip
The checker above confirms you have a plan for each category. This is the item-level version: what actually goes in the bags, whether you truly need it on trip one, and where it belongs so you are not unpacking everything at a roadside to reach a snack.
| Item | Trip One | Where it packs | When you need it |
|---|---|---|---|
| Helmet | Essential | Worn | Always. |
| Front + rear lights | Essential | Handlebar and seatpost | Legally required in many areas, and first trips tend to run longer than planned. |
| Shelter (tent, bivy, or tarp) | Essential | Handlebar roll | Unless you have confirmed indoor accommodation. |
| Sleeping bag or quilt | Essential | Handlebar roll | Rated to the expected overnight low, not the daytime high. |
| Sleeping pad | Essential | Handlebar roll or seat pack | Heat loss into cold ground is what most beginners underestimate. |
| Dry sleep clothes | Essential | Seat pack | Riding kit holds sweat, and damp layers sleep much colder than dry ones. |
| Water bottles or bladder | Essential | Frame cages | Sized to your longest confirmed gap between refills. |
| Filter or purification tablets | Conditional | Frame bag | Only if a refill point is unconfirmed or natural-source. |
| Dinner and breakfast | Essential | Seat pack | Always. Resupply plans fail on Sundays and in small towns. |
| Snacks | Essential | Top-tube bag | Must be reachable while moving, or you will not eat enough. |
| Stove and fuel | Optional | Seat pack | Skip entirely if you are happy with cold food on trip one. |
| Pot and spoon | Optional | Seat pack | Only if carrying a stove. |
| Spare tube | Essential | Frame bag | Yes, even running tubeless. |
| Tire levers and mini pump | Essential | Frame bag and frame mount | A tube you cannot fit is not a spare. |
| Tubeless plugs | Conditional | Frame bag | Tubeless setups only. |
| Multi-tool | Essential | Frame bag | Check it fits your bike’s bolts before you leave. |
| Quick link | Essential | Frame bag | Must match your chain’s speed. |
| Zip ties and tape | Essential | Frame bag | Weighs nothing, rescues racks, bags, and bottle cages. |
| Rain shell | Essential | Top of the load | Reachable without unpacking, or you will not stop to put it on. |
| Insulating layer | Essential | Seat pack | You stop generating heat the moment you stop riding. |
| Gloves and warm accessories | Conditional | Top-tube bag | Cold starts, exposed ridgelines, or shoulder-season nights. |
| Phone with offline route | Essential | Top-tube bag | Downloaded, not streamed. Signal disappears exactly where you need it. |
| Battery bank and cable | Essential | Frame bag | Navigation drains a phone faster than you expect. |
| Headlamp | Essential | Top-tube bag | Camp setup and after-dark repairs. |
| First-aid kit | Essential | Seat pack | Reviewed against your route’s remoteness. |
| ID and payment card | Essential | On your body | Not in a bag that could leave with the bike. |
| Shared plan | Essential | Weighs nothing | Someone who is not on the trip knows your route and return time. |
Packing rule of thumb: heavy and rarely needed goes low and central, light and bulky goes on the handlebars, and anything you want while riding goes in the top-tube bag. If you have to stop and dig for it, it is packed wrong.
Once the essentials are accounted for, use the cost guide below to decide what to borrow, rent, buy used, or postpone until after trip one.
What Your First Overnight Might Cost
Costs vary a lot depending on what you already own. The cheapest move is to borrow, rent, or buy used for your first trip—then upgrade only what actually annoyed you.
- Ultra-low cost: Use any solid bike + basic camp gear; borrow bags or strap items carefully.
- Budget upgrade: Prioritize sleep warmth, rain protection, and reliable lights.
- Nice-to-have: Lighter bags and a better pad once you know you’re hooked.
Pack Light, Ride Right
Light doesn’t mean uncomfortable. It means you carry fewer “maybes” and more “definitely useful.”
- Weigh the big stuff: sleep system, shelter, and cooking gear.
- Choose double-duty items: bandana, buff, lightweight layer.
- Split shared gear: if you’re riding with a buddy.
- Match the forecast: don’t pack for three seasons at once.
Do this now: Pack everything once, lift the bike, then remove one non-essential item. Repeat until it feels stable.
Riding Tips for First-Time Bikepacking
You’re packed. Now ride like it’s day one (because it is). Start easy, snack early, and give yourself permission to pause.
If you wait until you’re starving to eat, that 2 p.m. energy crash can hit hard—so fuel before you feel desperate.
- Start slower than you think: Let your body adapt to the extra weight.
- Fuel + hydrate early: Small bites and steady sips beat “big fixes.”
- Stop for strap checks: A 30-second tweak prevents a long, annoying problem.
- Keep your head up: Watch for cars, wildlife, and loose surfaces.
- Stay flexible: If weather or your body says “no,” adjust the plan.
Simple habit: Set a phone reminder to snack every 45–60 minutes on day one.
Common Mistakes to Avoid
Mistakes happen. The goal is to avoid the ones that turn a fun night into a stressful one.
If you want a quick checklist of the biggest trip-stoppers, read 21 Common Beginner Bikepacking Mistakes (And How to Avoid Them) before you pack.
- Overpacking (and packing poorly): Put heavier items low and centered in the frame bag; leave “maybe” items at home. Test the full load on a short ride.
- Skipping a shakedown ride: Small rattles, rubbing bags, or reach issues become major annoyances fast.
- Using brand-new gear on trip day: Test shoes, saddle, and bags on at least one loaded ride beforehand.
- Ignoring comfort issues: Fix saddle or hand pain early—don’t “push through” on night one.
- Getting surprised by weather: Check the forecast and pack one reliable rain/wind layer.
- Not having a water plan: Know refill points and carry enough between them.
Safety Tips for First-Time Bikepackers
Staying safe means you can focus on the fun. Safety also gets harder when you’re tired—like when it’s getting dark and your phone has 12% battery. Plan for that version of you.
- Helmet + lights: Wear the helmet. Use lights at dawn, dusk, and in shade.
- Share your plan: Send your route, expected check-in time, and a photo of your bike setup to a trusted contact (or use a tracking app).
- Travel insurance: For longer or remote trips, compare bikepacking travel-insurance options for medical evacuation, trip-cancellation terms, activity exclusions, and any bike-damage limits. Coverage varies by policy.
- Stay reachable: A satellite messenger can help in low-signal areas.
- Ride predictably: Follow road rules and stay alert on shared roads.
- Wildlife basics: Store food properly and give animals space.
- Bear spray (only where recommended): If it’s legal and advised for your area, follow local wildlife guidance and practice safe handling.
Do this now: Text one person: your start, your camp area, and the time you’ll check in.
Frequently Asked Questions
Next Steps
After your first overnighter, you’ll have real data: what you used, what you didn’t, and what you wish you’d done differently. That’s gold—use it, but change one thing at a time.
Do this for trip #2:
- Swap one piece of gear.
- Tweak one route choice.
- Fix one comfort issue.
Bikepacking is more than a bike ride. It’s the quiet after you park your bike at camp, the first sip of coffee outside, and the feeling that you can do hard things—without making them complicated.
Bookmark this beginner bikepacking guide and reuse the checklist before your next overnight. Pick a date for a one-night trip—even if it’s a month out.
Outdoor riding and camping carry real risks. This article is general education—not personalized advice—and your route, weather, and experience level can change what’s “right” for you. If you’re unsure about fitness, safety, or gear setup, talk with a qualified professional (like a bike mechanic, coach, or medical provider) before you go.