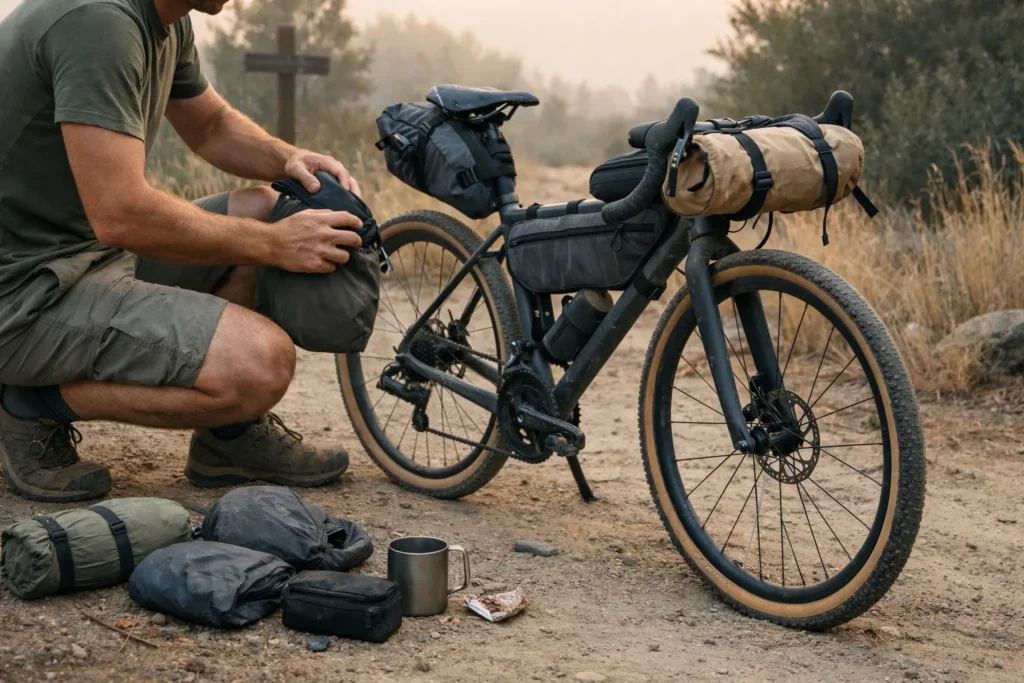
The GPX said water in 18 miles. The creek had been dry for two years.
A guy in a pickup slowed beside me, looked at my two nearly empty bottles, and asked, “You plannin’ on that creek up ahead?” I was. He handed me a litre from his cooler, and I made it to town. The route came from a well-regarded blog. The post was four years old. Nobody had checked it since.
That was when I stopped treating downloaded routes as finished plans. Now I build—or rebuild—every trip through the same seven-step process: realistic daily stages, confirmed resupply, calculated water gaps, checked surfaces, and bailout options. The first pass takes about two to three hours. Each route gets faster.

This page contains affiliate links and may include sponsored content. As an Amazon Associate, I earn from qualifying purchases at no extra cost to you. Amazon links are labeled #ad; other affiliate links may be marked as “affiliate link,” “Sponsored,” or “(paid link).” Learn more.
Table of Contents
- What Makes a Bikepacking Route Actually Work
- The 7-Step Route Building Framework
- GPX Files for Bikepacking: Building, Editing, and Cleaning
- Resupply Strategy
- Real Walkthrough: Building a 3-Day Route
- Common Route Planning Mistakes
- Pre-Departure Checklist
- Frequently Asked Questions
- Where to Go From Here
Not ready to build from scratch? The best bikepacking routes guide lets you compare established routes by difficulty, season, and logistics.
What Makes a Bikepacking Route Actually Work
Before you open any app, it helps to know what you’re optimising for. A good bikepacking route has five things working together:
- Achievable daily distances — not what you can do on your best day, but what you’ll do on day three, loaded, with elevation
- Water at the right intervals — sources you’ve verified are reliable, not “should be fine”
- Resupply that matches your carry capacity — with real store hours, not just a town name on a map
- Surface type you can actually ride — the difference between “unpaved road” and “sand wash” is not academic
- Bailout options — at least one per day; plans change, bodies break down
Most routes you download are strong on one or two of these and vague on the rest. Building your own means you get to verify all five before you leave.

The 7-Step Route Building Framework
Step 1 — Define your trip constraints
Start here, not with a map. The same questions apply whether you’re figuring out how to plan a bike tour across a new state or a local 3-day loop — answer these before you open anything:
- How many days do you have, including travel?
- Point-to-point or loop? (Loops are logistically simpler; point-to-point requires a shuttle or public transport plan)
- What’s your realistic daily range on a loaded bike on mixed terrain?
- Any non-negotiables — terrain type, specific region, starting town?
For route planning, I start with 45–65 miles/day on a loaded gravel bike over mixed surfaces and 30–50 miles/day on a hardtail with significant singletrack or climbing. Those are starting ranges, not universal averages. If it’s your first multi-day trip, use the lower end and add a buffer day. The most common planning mistake isn’t underestimating distance — it’s forgetting that day three exists.
Step 2 — Sketch the macro shape
Open Google Maps (satellite view) or Gaia GPS and draw a rough territory — not a route yet, just a corridor. Where does it start and end? What’s the general shape? Are you going through mountains, along a river valley, through high desert?
At this stage you’re asking: does the geography support what I want to do? Are there obvious barriers — mountain ranges, rivers with no crossings — that’ll force you somewhere you don’t want to go? Mark any must-hit points: a particular pass, a town you want to stay in, a stretch of singletrack you’ve heard about.
Don’t route yet. Just sketch.
Step 3 — Set realistic daily targets and mark resupply
Take your daily mileage estimate and divide your total distance into day-segments. Then immediately ask: where does resupply fall within those segments?
The rule I use: no more than three days between resupply points unless you’re deliberately going remote and have planned food weight accordingly. At a rough 1.5–2 lbs of food per day, three days means about 4.5–6 lbs; five days can mean 7.5–10 lbs before packaging. That is enough to affect storage, handling, and comfort.
| Days between resupply | Food carry (est.) | Notes |
|---|---|---|
| 1–2 days | 1.5–4 lbs | Usually easy to fit and distribute |
| 3 days | 4.5–6 lbs | My standard planning ceiling |
| 4–5 days | 6–10 lbs | Storage and handling become more noticeable |
| 6+ days | 9+ lbs | Consider a mail drop or a shorter segment |
Once you’ve marked your resupply towns, verify them before you commit. Google the store. Check whether it’s a full grocery, a gas station, or a seasonal operation. Look up the hours — small-town stores in the American West often close Sundays or keep 9–5 hours that’ll catch you out if you’re rolling in at 6pm. I’ve pulled into a Texas town at 7pm on a Sunday and found everything shut except a gas station with warm beer and stale peanuts. That was a three-bar dinner.
Step 4 — Plan your water
This is the step most route guides skip or hand-wave. Water planning isn’t complicated, but it requires actual research — not assumptions.
Use the USGS National Water Information System Mapper to inspect current and historical data at monitored sites, then use Gaia GPS and CalTopo map layers to identify other candidate sources. A mapped stream, spring, or monitoring site is not proof that water is flowing, publicly accessible, or safe to treat. Verify each source with recent trip reports, local land managers, or other current local information before relying on it.
Find the longest stretch between verified reliable sources on your route. That’s your planning number. Match your carry capacity to it:
| Gap between water | Carry needed (moderate temp) | Carry needed (hot / desert) |
|---|---|---|
| Under 20 miles | 2L | 3L |
| 20–35 miles | 3L | 4–5L |
| 35–50 miles | 4–5L | 6–7L |
| 50+ miles | Reconsider the route or add a cache point | |
These values are route-planning starting points, not hydration prescriptions. Adjust them for your body, pace, heat, elevation, exposure, and the reliability of the next source.
In the Southwest from May through September, start with the hot/desert column and add a personal delay margin rather than treating the table as a guarantee. I carry 4L minimum in desert terrain regardless of distance — one unexpected detour or a slower-than-planned day changes everything. As an optional capacity add-on for long dry gaps, the CNOC Vecto 2L packs flat and fits easily in a frame bag pocket.
Water filter I use on every route:
Sawyer Squeeze — A lightweight 0.1-micron filter for freshwater sources that can run from its pouch, a compatible 28mm bottle, or an inline hydration setup. It filters bacteria, protozoa, and microplastics; it is not a purifier for viruses or chemical contamination.
Water Gap Calculator
Enter your worst-case gap and conditions to get a starting carry estimate.
For a 25-mile stretch in cool or mild conditions with flat terrain, 3 L is a route-planning starting point with a buffer. Fill completely at the last confirmed source and adjust for your pace and current conditions.
Planning estimate only — verify current water reliability, heat, and access before departure.
Use the estimate as a capacity check: if your current bottles and reservoirs fall short, shorten the gap, plan a cache, or add carrying capacity before you build the final GPX.
Step 5 — Build the actual route
Now open your routing tool. Here's how the main options stack up for bikepacking specifically:
| Tool | Best for | Watch out for |
|---|---|---|
| Komoot | Fast route sketching, surface and way-type information, route warnings | Routing follows the selected sport/profile and map data — inspect access, warnings, and any surface section that looks questionable |
| Ride with GPS | Website route planning, POIs, GPX management, collaborative editing | The free Starter tier supports website route planning; advanced desktop tools, POIs, and map layers require a paid tier |
| CalTopo | Topo detail, route-line drawing and snap-to, terrain and hydro research | Cycling-specific cues are not its main strength — verify access and rideability rather than trusting a snapped line by itself |
| Gaia GPS | Route planning and sync, offline maps, on-device navigation | Offline maps and most map layers require Premium — download the route area before losing service |
| gpx.studio | Browser-based GPX planning, routing, merging, and cleaning | Routing still depends on map data — inspect access and surface before exporting |
A practical stack is to draft in Komoot or Ride with GPS, verify terrain, hydrography, and access in CalTopo, add POIs in Ride with GPS when your plan supports them, clean or merge files in gpx.studio, and download the finished route area in Gaia GPS for offline use. Whatever combination you choose, inspect route warnings, land access, surface type, and offline coverage before treating the GPX as final.
Step 6 — Verify the GPX
Before you trust any GPX — including one you built yourself — run through these checks:
- Open it in Google Earth and look in 3D — you'll immediately see if a section climbs something unreasonable or routes through terrain that doesn't make sense
- Check surface breakdown in Komoot or RWGPS — "unpaved" covers everything from hardpacked gravel to deep sand; if you can't tell, search the specific road name + "bikepacking" in recent trip reports
- Flag long commitment sections — any stretch over 30 miles with no turn options is a commitment point. Cross-check its elevation total against a second source; GPX elevation data is notoriously unreliable, and Komoot, Strava, and Ride with GPS calculate it differently.
- Download offline maps for the whole route in Gaia before you leave — cell coverage is not a planning assumption. I download a 10-mile buffer either side of the route so a wrong turn doesn't leave me navigating blind.
Step 7 — Score the route before you commit
Run through this quick sanity check before finalising anything:
- Daily mileage is achievable on day 3, not just day 1
- Every resupply store verified open on the day you'll arrive
- Longest water gap within your carry capacity with buffer
- All water sources confirmed reliable in current season
- GPX surface breakdown reviewed — no mystery sections
- At least one bailout option per day identified
- Offline maps downloaded for full route
- Someone at home has the route file and knows your return date
If you can tick all eight, go. If you're fudging more than two, the route needs more work.
GPX Files for Bikepacking: Building, Editing, and Cleaning
Working with GPX files for your bikepacking route throws a few curve balls that aren't obvious until you've lost an hour to a broken merge or a device that won't load your route. A few things that'll save you time:
Starting from scratch vs editing an existing GPX: If a good route exists for your area — bikepacking.com, local club, whatever — start there and modify it rather than building from a blank map. It's faster and you benefit from someone else's terrain knowledge. Just treat every water source and resupply stop as unverified until you've confirmed it yourself.
Merging GPX files: If you're stitching segments from different sources, use gpx.studio (free, browser-based). It handles merging cleanly and lets you manually adjust connections where segments don't quite line up.
Cleaning bad elevation data: If your GPX has elevation spikes or obviously wrong total climbing, use the "correct elevations" function in Ride with GPS or import into Strava and compare. For really messy files, gpx.studio lets you strip elevation entirely and re-apply from a clean source.
Export format: Export as .gpx for maximum device compatibility. If you're loading to a Garmin, test the file on the device before the trip — some models have file size limits or struggle with routes over a certain number of waypoints.
Resupply Strategy
A solid resupply strategy for bikepacking comes down to two numbers: your own food-per-day baseline and the miles between stops. I start with 1.5–2 lbs of food per day when prioritising calorie-dense choices, then adjust from previous trips, expected effort, weather, and appetite. Specific meal ideas and what actually tastes good after day three are in the guide below.
When you hit a resupply town, buy for the next segment plus a half-day buffer. If the next segment is three days, buy three and a half days of food. This gives you flexibility without overloading.
What actually works in small Western towns — and for most bikepacking routes in the USA, you'll be hitting at least a few of these: Dollar General and Family Dollar are more common than full grocery stores in rural areas and carry oatmeal, peanut butter, crackers, ramen, and candy — fine for a 1–2 day resupply. Gas stations with a deli offer hot food, which is genuinely valuable on a long trip. Always search "[town name] grocery store hours" the week before your trip — hours on Google Maps aren't always current for small rural stores.
Real Walkthrough: Building a 3-Day Route
Here's how this process looks applied to a specific trip — a three-day loop in the Hill Country of Texas, starting and ending in Fredericksburg.
Step 1 — Constraints: 3 days riding, loop, gravel bike, targeting 55 miles/day average.
Step 2 — Macro shape: In Google Maps satellite view, I sketched a counterclockwise loop heading north through Llano County, east toward Mason, south back via the Pedernales corridor. Total rough distance: ~165 miles. Fits the 55/day target with some flex.
Step 3 — Resupply: Fredericksburg (start/end, full grocery), Llano at mile ~55 (HEB grocery, open on my arrival day when I checked), Mason at mile ~110 (small grocery, hours confirmed by phone for my planned arrival). Three segments, all under three days, all verified for that trip.
Step 4 — Water: Hill Country can have better water availability in spring than summer. I identified seven potential sources using CalTopo hydro and topo layers, then cross-referenced four with recent trip reports — two confirmed, two uncertain. The worst verified gap for that trip was 28 miles. My planning estimate was 3 L, and the bike carried 3.5 L comfortably.
Step 5 — Route build: Drafted in Komoot on gravel/touring profile. Manually checked every auto-routed section over 10 miles — Komoot tried to put me on Highway 87 twice. Corrected both to county roads. Added water POIs and resupply stops in Ride with GPS.
Step 6 — GPX verification: Opened in Google Earth — one section in the Llano Uplift looked sketchy (exposed granite terrain, no clear track visible from above). Found a recent trip report confirming it's rideable but slow. Adjusted daily target for that segment from 55 to 45 miles.
Step 7 — Scorecard: All eight boxes ticked. Went two weeks later. No drama.
Common Route Planning Mistakes
Planning for your best day, not your average
You rode 80 miles last weekend on a day ride. Loaded, on day three, with a headwind, you'll do 50. Plan for 50.
Trusting GPX water sources without verifying
Any water source shown in an older route file needs checking, especially if it is seasonal or drought-sensitive. Conditions change, springs dry up, and water caches get moved or removed. This is the mistake that bites people in the desert.
Routing through “unpaved” without knowing what that means
In the American Southwest, unpaved can mean hardpack, washboard, loose gravel, sand, or chunky rock — very different riding experiences. Search the specific road, not just the route, before committing.
Ignoring seasonal closures and land access
Forest roads, wilderness areas, and some BLM land have seasonal closures for fire, hunting, or wildlife — and not all land is open for through-travel. Check with the relevant agency for any section passing through managed or private land before you finalise the route.
No bailout planning
Every day should have at least one point where you can cut to a paved road and get out if something goes wrong. Know where those points are before you need them.
Pre-Departure Checklist
Step 7 is your go/no-go gate before committing to the route. This checklist is for the 24 hours before you leave — execution, not planning.
- GPX loaded on device and tested — scroll the whole route
- Offline maps downloaded for full route plus 10 miles either side
- All resupply stores verified open on arrival days
- Water sources confirmed for current season
- Water carry capacity matches worst-case gap
- Filter/treatment method packed and functional
- Bailout options identified per day
- Route file shared with someone at home
- Return date and check-in plan confirmed
- Weather checked — contingency plan if major weather hits on day 2
- Any permits or access permissions confirmed
- Phone fully charged, battery pack packed
The difference between a trip you tell stories about and one you'd rather forget usually comes down to five things: water, food, surface, fitness pacing, and bailout planning. Build the route right and four of those are decisions you made at home, not problems you discovered on the road.
Frequently Asked Questions
Where to Go From Here
Most riders spend more time choosing gear than planning water. Flip that ratio. Two focused hours at home can prevent days of avoidable problems on the route, and the process gets faster every time you use it.
Your next move is simple: pick a region, open your planning app, and sketch the macro shape. Then work through distance, resupply, water, surface, and bailouts in that order. For help choosing the app you will use on riding day, see the Gaia GPS vs AllTrails guide.
If you would rather begin with an existing route, use the best bikepacking routes guide to compare difficulty, season, and logistics—then apply the same checks before you ride.
This route planning guide for bikepackers is for general education and trip preparation. Conditions, water sources, and road access can change — always verify with local land managers before your trip and carry appropriate safety equipment.