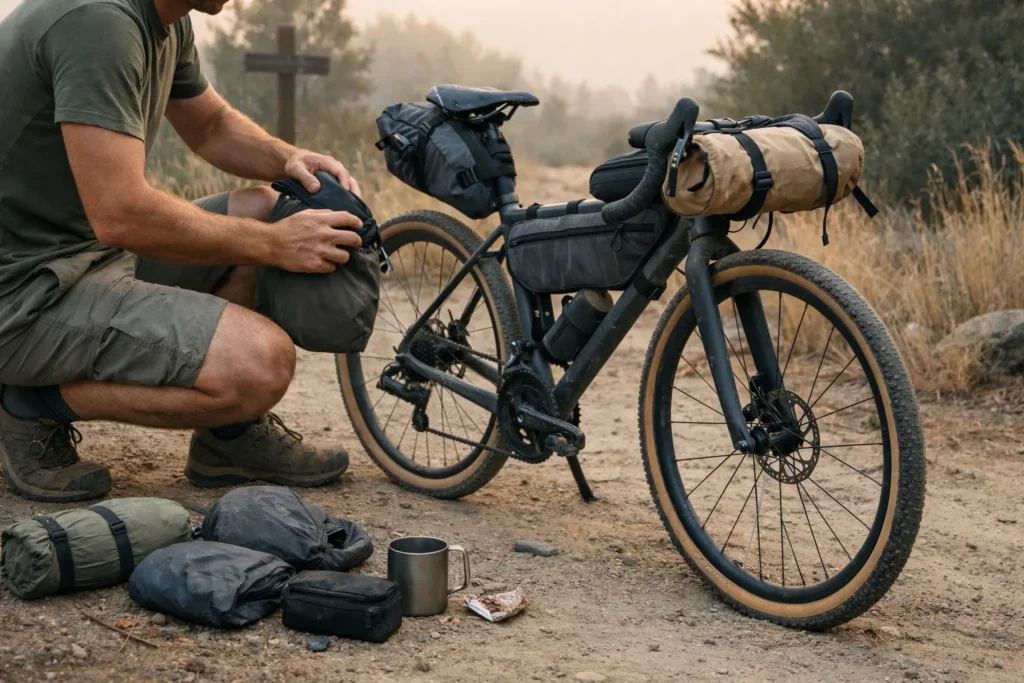
Mile 34, 6pm, a fork in a double-track with no signage. My phone showed a spinning wheel where the map should have been. I’d downloaded the route. I thought that meant I’d downloaded the map. It didn’t. I stood there for a solid four minutes in the kind of silence you only get when you’re 20 miles from the nearest town, watching my battery tick from 31% to 30%.

That mistake is why Gaia GPS vs AllTrails is not the whole question for bikepacking. The real job is building a navigation stack that still works when the screen goes blank: choose the right app, download the map rather than only the route, test the battery plan on your own phone, and carry a backup that does not need cell service. This guide walks through that full setup — including when a paper map stops being quaint and starts being necessary.
Updated July 2026: app subscription tiers, offline-map instructions, and key device specifications were reviewed against official product documentation.
This page contains affiliate links and may include sponsored content. As an Amazon Associate, I earn from qualifying purchases at no extra cost to you. Amazon links are labeled #ad; other affiliate links may be marked as “affiliate link,” “Sponsored,” or “(paid link).” Learn more.
Table of Contents
- Why “Just Download the App” Fails in the Backcountry
- Gaia GPS vs AllTrails: What Actually Matters for Bikepacking
- Choose Gaia, AllTrails, or Both
- Build Your Navigation Stack
- How to Set Up Offline Navigation Properly
- Battery Reality: Phone vs Garmin on a Multi-Day Ride
- Paper Maps and Compass: When You Actually Need Them
- Pre-Trip Navigation Checklist
- Backup Navigation Gear for Remote Trips
- Frequently Asked Questions
- Test Your Navigation Stack Before You Leave
Why “Just Download the App” Fails in the Backcountry
Here’s the thing almost every navigation guide skips: downloading a route is not the same as downloading a map.
When you save a GPX file or a trail in AllTrails, you’re saving a line — a set of coordinates. The map tiles underneath that line (the satellite imagery, the topo, the road names) are separate. They stream from the internet in real time by default. So you can have your route perfectly loaded and still see a blank grey screen the moment you lose signal, because the visual map never got saved to your device.

Both Gaia and AllTrails have proper offline map download features. But they work differently, they cover different territory reliably, and if you set them up wrong — or assume the default “save trail” does the job — you’ll find out the hard way at the worst possible time. The full workflow for offline bikepacking navigation is: plan your route on desktop, export the GPX, import it into your navigation app, then download the map tiles for the surrounding region — as a separate step.
This is why app choice matters less than understanding what you’re actually downloading. The USGS topographic map program has been the backbone of backcountry navigation for over a century — and understanding how topo layers work in digital apps is the same fundamental skill, just on a screen.
Gaia GPS vs AllTrails: What Actually Matters for Bikepacking
Both apps offer paid offline navigation, but the entry price is not the same: AllTrails Plus is currently $35.99 per year, while Gaia Premium pricing should be checked at purchase or renewal.
When bikepackers compare the best apps for bike routes, these two come up first — but they’re built for different use cases, and those differences become very obvious on a loaded bike three days from a town.
| Feature | Gaia GPS | AllTrails | Verdict |
|---|---|---|---|
| Offline map download | Choose active map sources, draw a rectangular download area, select a resolution, and save it locally. | Download a route, park, or custom Offline Area with a Plus or Peak plan. | Gaia offers deeper layer control; AllTrails now supports practical custom-area downloads. |
| Map layers for bikepacking | Gaia Topo, satellite, USGS Topo, Public Land, MVUM, Slope Angle Shading, and many specialist overlays | AllTrails, satellite, terrain, and road maps in the app; OSM, OpenCycleMap, and USGS Topo are available on the website; Peak adds condition overlays | Gaia remains stronger for land-management and specialist map layers |
| Bike-legal trail accuracy | Shows all tracks including unverified roads. You need to know what’s legal. | Filters by activity type. Better for finding established bike-legal trails. | AllTrails — better for established route discovery |
| GPX import | Imports GPX and several other route formats on the website, with synced access in the app. | Imports GPX routes on web and mobile; Peak also adds mobile route building and editing. | Both support custom files; Gaia remains the more map-centric workflow |
| Offline download size | Varies by area, active sources, and Low/Medium/High resolution; some sources have tile limits. | Varies by area, map types, included trails, and available device storage. | Check storage and complete the real download before departure |
| Interface complexity | Steep learning curve. Overwhelming until you configure it once. | Intuitive from day one. Almost no setup required. | AllTrails — matters on day 5 when your brain is fried |
| Battery drain (screen-on navigation) | No universal app-only rate; screen brightness, GPS use, temperature, recording, signal hunting, and phone condition all matter. | No reliable basis for assuming a major advantage on every phone. | Treat them as similar until you test your exact device and settings |
| Subscription cost | Premium is required for offline maps and specialist layers; verify the current purchase or renewal price. | $35.99/year for Plus or $79.99/year for Peak. | AllTrails Plus is the cheaper published entry tier for offline maps |
| Community trail data | Sparse. No reviews, no conditions reports. | Rich. Conditions updates, photos, recent completions. | AllTrails — genuinely useful for route research |
Use AllTrails when the route is established and recent community information matters most. Use Gaia when you need custom route files, land-management layers, waypoints, or more control over the map stored on your phone. Use both only when those are genuinely two separate jobs: AllTrails for research, Gaia for navigation in the field.
Choose Gaia, AllTrails, or Both
The deciding question is not which app is universally better. It is which information your route demands after cell service disappears.
Choose AllTrails if: your route mostly follows established, named trails; recent conditions, photos, and rider reports will help you evaluate it; or you want the simpler route-discovery experience.
Choose Gaia if: your route uses custom GPX files, public-land or forest-road navigation, unmarked doubletrack, specialist map layers, or waypoints you created during planning.
Use both if: research and field navigation are genuinely different jobs — AllTrails to find and vet established connectors, Gaia to store the route, surrounding maps, and waypoints for the ride itself.
Not sure which route you’re navigating yet? The bikepacking routes guide has vetted options across every distance and terrain type.
Build Your Navigation Stack
Answer four questions to get an app, power, and backup plan matched to your trip.
How to Set Up Offline Navigation Properly
Here is the actual process for each app — including the airplane-mode test to run before leaving home. If you haven’t built your route yet, start with the route planning guide.
Gaia GPS offline setup
- Install Gaia and log in. A subscription is required to download maps.
- Load your route. Import your GPX file or build the route, then sync it to the app.
- Activate the map sources you need. Gaia Topo is the durable default; add USGS Topo, Public Land, MVUM, or another relevant layer only where it helps the route.
- Create the offline area. Tap the plus icon, choose Save Offline Maps, and drag the highlighted rectangle around the full route with a practical buffer.
- Choose sources and resolution. Confirm the layers, select Low, Medium, or High resolution, name the download, and save it. On iPhone, keep Gaia open with the screen on until the download finishes.
- Test in airplane mode. Turn off Wi-Fi and cellular data, open Gaia, and inspect several points along the route. If the map and route appear at every test point, the offline package is ready.
AllTrails offline setup
- Find or import your route. Plus or Peak is required for offline maps.
- Download the route. Tap the download arrow on its card. When the indicator changes to the completed state, tap it again if you want to choose additional map types.
- For broader coverage, create an Offline Area. Open Explore, switch to map view, tap the down arrow, position the selection box, tap Download [number] trails, name the area, and save it. Completed areas appear under Saved → Areas.
- Test in airplane mode. Open the saved route or area and inspect the middle and edge of the download before leaving home.
What doesn’t work offline (in either app)
- New online searches, live weather, and condition updates will not refresh without a connection
- AllTrails community information may be present in some downloaded products, but new reviews, photos, and conditions will not update until you reconnect
- Gaia map-source information and legends are not available offline, so save a screenshot when a symbol key matters
- Any map source, layer, route, or surrounding area you did not actually include in the download
Battery Reality: Phone vs Garmin on a Multi-Day Ride
Before you plan a power bank around someone else’s battery percentage, run one full test day with your own phone: load the route, switch to airplane mode, and use the screen the way you expect to ride. Brightness, continuous GPS and recording, temperature, signal hunting, battery age, and the exact device change the result too much for a universal drain number to be trustworthy.
This is where a dedicated Garmin starts to make sense for bikepacking: a cycling computer or handheld keeps navigation separate from the phone you need for communication, photos, and emergencies. Some handheld models also use replaceable AA batteries. For the full breakdown of power strategy on multi-day rides, the bikepacking power and charging guide covers what to carry and how to size it for your trip length.
| Setup | What to expect | Planning note |
|---|---|---|
| Phone only (screen on, no power bank) | Highest-drain option; many phones will not sustain a full riding day with the display continuously active. | Test your exact phone and app before relying on this setup. |
| Phone + screen off (glance-only navigation) | Substantially lower drain than continuous screen-on use. | Use audio or vibration prompts where reliable and wake the screen only at decisions. |
| Phone + 10,000 mAh power bank | Adds useful reserve, but the number of recharges depends on the phone, cable, temperature, and conversion losses. | Measure one full charge cycle at home instead of assuming a fixed trip length. |
| Garmin eTrex 32x (standalone GPS) | Up to 25 hours in GPS mode on two AA batteries. | Carry compatible spares and plan from the rated runtime, not a guaranteed number. |
| Garmin Edge 1040 Solar | Up to 100 hours in battery-saver mode; solar charging can extend runtime under suitable conditions. | Solar is an extension, not a promise of indefinite power. |
Think about power and navigation in three layers:
- Level 1 — Phone + power bank. Suitable for established routes when a full test day confirms that your phone and reserve cover the longest expected riding day.
- Level 2 — Phone + power bank + Garmin Edge. The Garmin handles active navigation while the phone stays available for communication, photos, camp tasks, and backup.
- Level 3 — Garmin Edge + paper maps + compass. The redundancy layer for remote routes where an electronics failure would have serious consequences.
Cold can temporarily shorten lithium-ion battery life and may prevent a phone from charging until it warms up. Keep the phone and power bank insulated, carry extra margin, and test your setup in similar temperatures before departure. The winter bikepacking gear guide covers the full cold-weather setup, from layering to battery management.
Paper Maps and Compass: When You Actually Need Them
This isn’t about nostalgia. Paper maps do not need a battery. They do not crash. They work when your phone goes in a river. In genuinely remote terrain, the skill gap between “I have a map” and “I can use a map” is the difference between a detour and a genuine problem.
When you actually need paper backup
- Trips where an electronics failure would leave you without a clear bail-out or obvious route
- Routes crossing unmarked or multi-track terrain
- Cold, wet, or extended conditions where battery failure is credible
- Remote terrain with no carrier coverage and few reliable landmarks
How to orient a map (the basics)
When it comes to using a compass with a map, the fundamentals are simpler than most riders expect — and worth an afternoon of practice before you need them:
- Find your location on the map using terrain features — ridgelines, drainages, junctions you’ve passed. Practice this before you need to do it under pressure.
- Orient the map to north. Hold the compass flat, rotate the map until the north arrow aligns with the needle. The map now mirrors the terrain around you.
- Correct for declination. The angle between magnetic north and true north changes with location and over time. Look up the current value for your route. Set it on a compass with adjustable declination, or apply the correction manually when using a fixed-scale model.
- Take a bearing to your next landmark. Point the direction of travel arrow at your target. Rotate the housing until orienting lines align with map north. The number at the index line is your bearing. Follow it.
If your route goes deep into unmarked terrain, spend an afternoon practicing this before you leave — ideally somewhere you already know well so you can verify your bearings against reality. National Geographic Trails Illustrated maps are waterproof and widely available for many wilderness areas. Choose a compass whose declination method you understand before the trip.
If you’re combining map-and-compass navigation with overnight wild camping, the solo wild camping safety guide covers campsite selection and route awareness when you won’t see another person for days.
Waterproofing your paper map
A folded topo in a jersey pocket is useless after 20 minutes of rain — I’ve watched a full day’s route turn to pulp by mile 8. A waterproof handlebar map case keeps the relevant section visible without stopping to dig through a bag, and on day four when you’re running on fumes, that matters more than it sounds.
Pre-Trip Navigation Checklist
Run this the night before every trip. It takes less than ten minutes.
Backup Navigation Gear for Remote Trips
These four options cover two different failures: losing your navigation and losing your ability to call for help. Choose by failure mode rather than treating them as a mandatory bundle.
Navigation backups
Garmin eTrex 32x — an AA-powered option for bikepacking trips where replaceable batteries matter. Garmin rates it for up to 25 hours in GPS mode on two AA batteries. It is an older model and availability varies, so confirm current support and stock before buying. For managing power across all your devices on tour, the full bikepacking power strategy guide covers the full picture.
Waterproof handlebar map case — an Ortlieb or similar keeps your paper topo visible without stopping to dig through a bag. More useful than it sounds on day four when your brain is running at 60%.
Suunto A-10 compass — a simple baseplate compass with a fixed declination correction scale. Unlike an adjustable-declination model, it does not store the correction for you; look up the local value and apply it manually. No batteries, and Suunto rates it for operation down to -22°F.
Emergency communication
Garmin inReach Messenger — trip length matters less than whether your route leaves you without reliable cell service or a practical way to call for help. The inReach Messenger provides two-way messaging, SOS, and location sharing. If plan structure or messaging style is a factor, the ZOLEO Satellite Communicator covers the same core SOS and two-way messaging job through a different device-and-service model — compare current device and subscription costs before you commit.
Satellite communicator for remote trips:
Garmin inReach Messenger — Two-way satellite messaging + SOS when your route leaves reliable cell service.
Frequently Asked Questions
Test Your Navigation Stack Before You Leave
The moment to discover that you saved a route but not the map is not at a trail fork with 30% battery. Choose the app that fits the route, download the surrounding map area, run the whole setup in airplane mode, and test the power plan for a full riding day. Then add the backup your consequences justify: a second navigation device, a paper map and compass, or satellite communication. Navigation redundancy is built before the trip — not improvised when the screen goes blank. Looking for a route to test it on? The verified bikepacking routes guide has options ready to load.
This offline navigation guide is for general education. Trail conditions, app features, and device specs change — always verify current information before a remote trip and ride within your skill level.