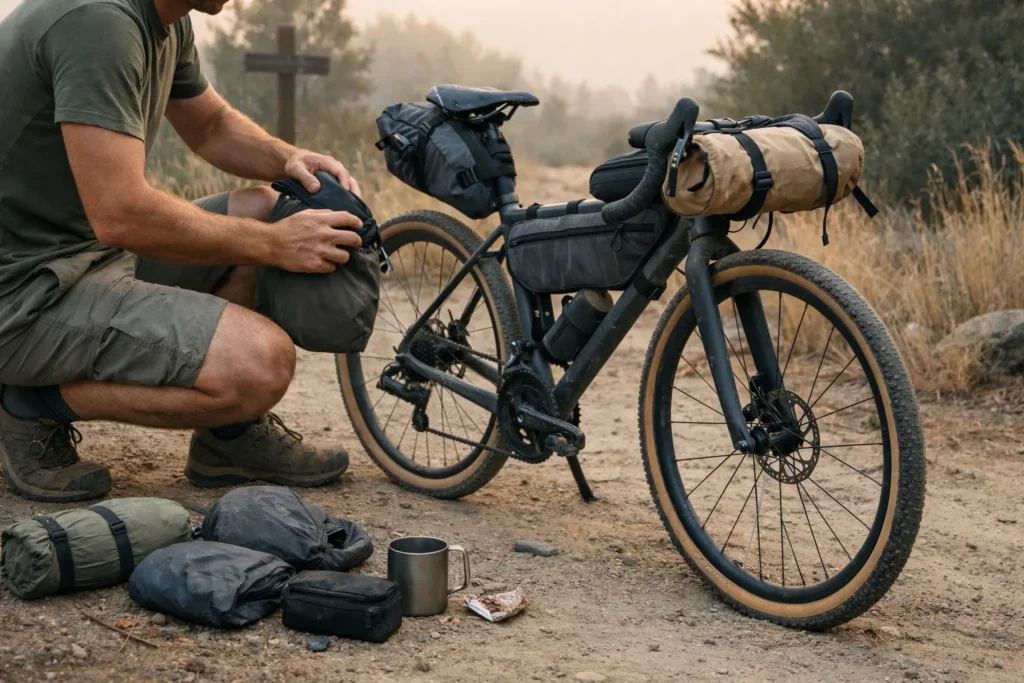
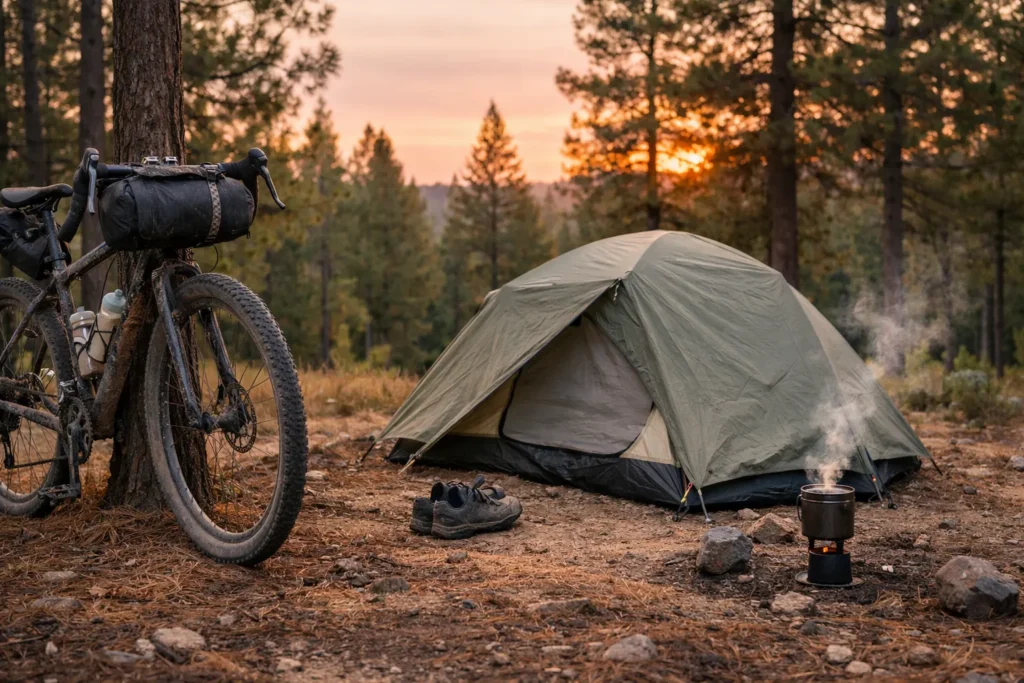
Day 4, somewhere in the Pyrenees. I was 47 km into an 80 km day, loaded with 14.5 kg of kit, when the descent turned from packed gravel to loose, chunky scree. At about 38 km/h the front end of my alloy gravel bike started doing something I can only describe as suggesting it might let go. Not actually letting go — just informing me, very clearly, that it was considering its options. My hands were locked on the hoods. My forearms were burning. I was braking harder than I should and drifting wider than I wanted.
The bike wasn’t broken. It wasn’t even bad. It was simply the wrong bike for that terrain with that load. That mismatch matters more than brand or price once bags are attached. On a hardtail with 2.2″ tires, I’d have approached the descent differently. On the same gravel bike, dropping the front tire to 22 psi and moving 1.5 kg into the fork cages would at least have made the handling calmer.
If you’re comparing the best bikepacking bikes, start with the four platform types and the choices that change loaded handling: terrain, tire volume, gearing, cargo position, and maintenance. Once the platform is clear, the bikepacking gear and setup guide covers the bags, kit, and packing decisions that come next.
Last updated July 2026: current bike examples, specifications, and availability-sensitive recommendations were rechecked against manufacturer pages.
This page contains affiliate links and may include sponsored content. As an Amazon Associate, I earn from qualifying purchases at no extra cost to you. Amazon links are labeled #ad; other affiliate links may be marked as “Sponsored,” or “(paid link).” Learn more.
Table of Contents
- Quick Self-Assessment
- Head-to-Head Comparison
- Find Your Best-Fit Bike
- Adventure Gravel Bike
- Hardtail MTB
- Rigid MTB
- Traditional Touring Bike
- Bikepacking with Panniers vs Soft Bags
- Gearing and Load Distribution
- Can You Use the Bike You Already Own?
- What Extra Bike Budget Actually Buys
- Bikepacking Bike FAQs
- Match the Bike to Your Real Route
Quick Self-Assessment
Before the deep dives, here’s a plain-language snapshot. Find yourself and keep reading from there.
Mostly pavement + light gravel: Adventure gravel bike. Not race geometry — look for 69–70° head angle and 47mm+ tire clearance.
Chunky forest roads + singletrack (30%+): Hardtail MTB. The front suspension pays for itself in arm fatigue savings over multi-day trips.
Remote routes, heavy loads, simplicity priority: Rigid MTB. No fork service in the field. Steel is generally easier to repair in more places than carbon.
Road-dominant route + panniers + max capacity: Touring bike. Don’t let bikepacking culture talk you out of the right tool for your route.
Head-to-Head Comparison
Screenshot this. Come back to it when you’re second-guessing yourself at 2am on a forum.
| Bike Type | Best Terrain | Max Tire | Loaded Stability | Pavement Efficiency | Mount Options | Maintenance | Cost Range |
|---|---|---|---|---|---|---|---|
| Adventure Gravel | Gravel/fire roads, light singletrack | 700×50mm | Medium | High | Medium (fork cages, frame bags) | Simple | $1,800–$4,500 |
| Hardtail MTB | Chunky singletrack, rocky terrain | 29×2.4″ | High | Medium | High (fork legs, multiple mounts) | Fork service needed | $1,200–$3,500 |
| Rigid MTB | Remote routes, mixed terrain | 29×2.6″ | High | Low–Medium | High | Dead simple | $900–$2,800 |
| Touring Bike | Road, packed gravel, panniers | 700×45mm | Very High | Medium | Maximum (rack bosses standard) | Simple | $1,200–$3,000 |
Price ranges above are planning bands for complete bikes, not quotes. Regional pricing, build kits, and frameset-versus-complete-bike availability change frequently.
The table gives category averages; your own route can still flip the answer. Use the selector before diving into the detailed breakdowns.
Find Your Best-Fit Bikepacking Bike
Adjust your terrain mix and trip preferences to see a live ranked match, then jump to the bike type, picks, and trade-offs that fit best.
Terrain mix
Read the matching bike breakdown ↓
All four types ranked for your profile
Adventure Gravel Bike
In my experience testing both on loaded multi-day routes, the split most articles skip is the most important one: race gravel ≠ bikepacking gravel. A race-oriented gravel bike — aggressive geometry, 40mm max tire clearance, stiff carbon layup — is a poor bikepacking platform. It’s built for speed over smooth gravel with minimal weight. Once you put 14 kg on it and point it at a loose descent, you’re fighting the bike.
An adventure gravel bike is different. Slack head angle (around 69–70°), longer wheelbase (1,020mm+), stack-friendly geometry for upright comfort over 8-hour days, and roughly 50mm or more of tire clearance are the useful signals. Current examples show why build-level verification matters: Canyon lists up to 54mm clearance on the Grizl AL, while Trek lists 50mm clearance on Checkpoint ALR Gen 3 models. Storage, rack compatibility, and fork mounts vary by frame and trim, so check the exact build rather than relying on the family name.
Loaded geometry reality: At 12+ kg rear load, a 71° head angle gravel bike starts to feel light and darty at the front above 35 km/h on loose gravel. Drop tire pressure to 22–24 psi at the front before any chunky descent. Keeping more weight forward — frame bag before an oversized saddle bag — becomes especially important on gravel geometry. The best gravel bike for bikepacking is one where the geometry was designed with load in mind, not race speed. Gravel bike bikepacking on technical routes rewards patience with tire pressure and weight distribution more than any other platform.
| Spec | Target for Bikepacking |
|---|---|
| Head angle (loaded) | 69–70° (not race geometry) |
| Minimum tire clearance | 700×47mm or wider |
| Loaded-climbing target | About 18 gear inches or lower (for example, 30t with 46t) |
| Fork mounts | Both legs, 3-cage minimum |
Properly set up, gravel bike bikepacking rewards you with the most versatile platform on mixed routes. Earns its place: fastest on pavement and packed gravel, 4 hand positions on drop bars (huge on 100 km days), and the lightest setup of the four types at a similar spec level. Real limitations: front-end can feel light on loaded descents, a roughly 50mm tire ceiling limits confidence on rougher singletrack, and carbon-fork cargo limits vary by model — check the exact rating before loading one.
Who should NOT buy this: if more than 25% of your route is rocky singletrack or sustained chunky doubletrack, you’ll be fighting the bike on the bits that should be the most fun.
Representative current models to compare: Canyon Grizl AL, Trek Checkpoint ALR Gen 3, and Mason Bokeh. Verify build-specific gearing, mount ratings, sizing, and regional availability before buying.
Bottom line: choose adventure gravel when pavement and ordinary gravel dominate but you still want room for rough connectors. Skip it when technical singletrack is a central part of the route rather than an occasional interruption.
Entry-tier gravel option: Tommaso Illimitate — aluminum frame, carbon fork, and a current Shimano Tiagra 2×10 build.
Treat it as a budget complete bike rather than a direct substitute for the adventure-gravel benchmarks above. Confirm the exact drivetrain, size availability, and assembly requirements on the current listing before ordering.
Hardtail MTB
On a loaded rocky descent, a hardtail changes the job from surviving impacts to choosing a line. After riding loaded hardtails on rough routes across Spain and Portugal, I’d say it plainly: the front end just eats the hits that a gravel bike sends into your wrists and lower back. By day 4 or 5, that 100–120mm fork is not a luxury—it is fatigue management.
What sets quality hardtail bikepacking bikes apart is geometry designed for loaded touring, not just trail riding. A useful fork-travel range for many bikepacking routes is 100–120mm. Longer-travel hardtails can work when the frame was designed around that fork, but do not exceed the manufacturer’s approved travel. Also: factor in fork service. Follow the fork manufacturer’s hour-based lower-leg and damper schedule, and shorten it when repeated dust, mud, or loaded mileage warrants it. A rigid setup eliminates this service item entirely. 29er vs 27.5+: for many mixed routes, 29×2.2″ or wider is the more efficient choice because it carries momentum well over loose ground and repeated obstacles. On tire setup, the tubeless vs tubes guide for bikepacking covers what to run on loaded tours.

Earns its place: planted on loaded descents, front suspension absorbs vibration on sustained rough terrain, flat bar gives forearm rest position (critical on long days), and more mount points than gravel. Real limitations: slower pavement transfers, recurring fork service under the manufacturer’s schedule, and entry-level forks that may not suit repeated loaded use.
Who should NOT buy this: if your route is 70%+ pavement with smooth gravel connectors and you rarely venture onto proper singletrack, the speed penalty and fork maintenance aren’t worth it.
Representative current models: Salsa Timberjack, Surly Karate Monkey, and current Kona Honzo builds. Fork travel now varies widely across trail hardtails—some complete bikes ship with 130–140mm forks—so confirm the exact build rather than assuming every model matches the 100–120mm setup recommended here.
Bottom line: choose a hardtail when rough terrain is a meaningful part of the route and control matters more than pavement speed. Skip it when most days are road transfers and the suspension fork would add maintenance without enough payoff.
Rigid MTB
A rigid MTB starts making sense when the route is remote enough that every moving part becomes another service decision. With 29×2.4″–2.6″ tires, a rigid steel bike can carry a real load without a suspension fork or pivots to maintain. Steel may add a little compliance and can sometimes be repaired by a competent welder where specialist carbon repair is unavailable; carbon saves weight but usually needs more specialized repair.
The Surly Ogre, the Kona Sutra, the Crust Evasion — these aren’t compromises. They’re deliberate choices. Fat tires at 18–22 psi absorb road buzz better than 40mm gravel tires at 35 psi. The handling is predictable and planted. Loaded geometry with a low bottom bracket and long wheelbase is stable at speed in a way race-oriented bikes simply aren’t.
Loaded handling reality: Frame compliance, tire volume, and lower pressure all contribute to comfort on a rigid bike. A 29×2.4″ tire around 18–22 psi can absorb sustained vibration well, but the right pressure depends on rider weight, load, casing, rim width, and terrain. A practical starting setup: high-volume tubeless tires, conservative front pressure, and enough clearance for mud and casing flex. For riders who prioritize remote simplicity, the appeal compounds because there is no suspension fork to service or damage.
The honest limitation: pavement efficiency. A 29×2.4″ knobby at 22 psi is slow on tarmac. If you have a 70 km pavement transfer day, it’s going to feel long. This is the bike for route profiles where rough terrain is the point, not the obstacle. REI’s bikepacking bike guide covers the rigid vs hardtail decision well if you want a second opinion.
Representative current platforms: Surly Ogre frameset, Kona Sutra LTD, and Crust Evasion. These are sold in different formats—frameset versus complete bike—so compare the exact build, wheel standard, and cargo mounts rather than treating their prices as directly equivalent.
Bottom line: choose rigid when remote simplicity and high-volume tires matter more than fast pavement. Skip it when sustained technical descending or long tarmac transfers dominate the route.
Remote-route repair pick: The Crankbrothers M19 combines 19 functions with an 8–12-speed chain tool. It does not replace route-specific spares, but it covers the common adjustments that make a simple rigid setup easier to keep moving.
Traditional Touring Bike
By day 7 of a road-heavy trip, the argument for a touring bike stops being aesthetic. You’re tired, your hands hurt, and you want your headlamp without unpacking half the bike. Racks and panniers start to look less old-fashioned and more like the right tool.
If your route is 70%+ paved or packed gravel, you’re carrying 18–25 kg of kit, and camp access matters, the touring bike earns its weight. A long wheelbase and low centre of gravity make it the most stable of these four categories on paved and packed-gravel routes under a heavy load. Steel can soften some road buzz over long days, and panniers make frequently used camp gear easier to reach than a tightly packed soft-bag system.
The honest limitation: off-road capability tops out around smooth gravel and hard-packed doubletrack. Earns its place: maximum load capacity, most stable loaded handling, steel compliance over long days, easy camp access. Current models to compare: Surly Disc Trucker and Kona Sutra SE. The Surly Long Haul Trucker is now a legacy model, Trek’s 520 is no longer a current production recommendation, and REI’s ADV 3.2 dates to an older generation.
Bottom line: choose a tourer for road-heavy routes, heavier loads, and easy camp access. Skip it when frequent singletrack, narrow trail obstacles, or hike-a-bike sections define the trip.
Budget rack-ready alternative: Mongoose Elroy — a rigid 700C adventure bike with an included front rack, rear-rack mount, and five bottle-mount positions.
It is not a hardtail or a true heavy-duty tourer. Availability and trim could not be confirmed on Mongoose’s current model pages, so verify that the linked listing still matches the rigid-fork 54 cm configuration before buying.
Bikepacking with Panniers vs Soft Bags
Bikepacking with panniers is a real use case that “just use bags” advice ignores entirely. Here’s when each setup wins — and the frame compatibility reality nobody publishes.
Soft bags win when: your route includes technical singletrack (panniers sway and catch obstacles), weight distribution matters, your frame doesn’t have rack mounts (most carbon gravel bikes), or your total load is under 12 kg.
| Factor | Soft Bags | Panniers |
|---|---|---|
| Best for | Singletrack, technical terrain | Paved roads, smooth gravel |
| Capacity | 8–12 kg | 18–25 kg |
| Weight distribution | Low, tight to frame | Higher, side-mounted |
| Rack compatibility | Not required | Fork/rack bosses needed |
| Budget | $$ | $ (reusable across bikes) |
| Example | Rhinowalk Seat Bag 10L | ROCKBROS Panniers 30L |
The hybrid approach to bikepacking with panniers — small rear rack + frame bag + fork cages — gives the best of both worlds for mixed-terrain routes with moderate loads (12–16 kg). More accessible than pure bags, more off-road capable than full panniers. For the full soft bag setup, see the bikepacking bags system guide on frame, seat, and handlebar configurations.
Gearing and Load Distribution
A useful target for steep loaded climbing is about 18 gear inches. That’s roughly a 30t chainring with a 46t cog, or a 32t chainring with a 50t cog. Higher gearing can force a slow grind or more hike-a-bike on sustained steep grades, especially with a full load. Treat 18 gear inches as a planning target, not a universal cutoff.
Load distribution matters as much as total weight. Rear-heavy loading raises the front wheel under braking and makes high-speed gravel descents feel unstable. The goal is roughly 40% front / 60% rear for mixed terrain. Fork cages loaded with water bottles are the cheapest stability upgrade you can make.
For drop-bar setups: the frame bag is your primary load carrier, not the saddle bag. A large frame bag low in the triangle keeps weight centred and low. The saddle bag carries lightweight bulky items — sleeping bag, clothes. Not tent poles. Not water.
Practical frame-bag pick: The Blackburn Outpost uses coated 70D ripstop, adjustable mounting, an expandable body, and a hose port. Fit varies by frame, so measure the main triangle and check the size guide before ordering.
Can You Use the Bike You Already Own?
Often, yes. The cheapest good bikepacking bike is the one that already fits you and can be made safe for the route. Before shopping, test your current bike against four failure points.
| Check | Probably workable | Reason to reconsider |
|---|---|---|
| Terrain and tires | The bike clears tires suited to your actual surfaces, with room for mud and casing flex. | The route is rough enough that the frame or fork forces narrow, high-pressure tires. |
| Low gear | Your easiest gear lets you climb the local loaded test route without repeated grinding or stalling. | The route is steep and your lowest gear sits well above the planning target discussed above. |
| Cargo | Bags or racks attach securely within the frame and fork ratings, with no heel strike or tire rub. | The only workable setup overloads one end of the bike or makes the steering unpredictable. |
| Fit and control | A loaded training ride leaves braking, hand position, and basic comfort manageable. | The bike remains difficult to control or uncomfortable after reasonable fit and contact-point adjustments. |

What Extra Bike Budget Actually Buys
Use price as a filter, not the verdict. Before moving up a tier, ask which problem the extra money solves: fit, lower gearing, better tires, serviceable suspension, or lower weight. If the answer is only a prestige frame material or a component-name upgrade, keep the difference for bags, contact points, maintenance, and repairs.
About $1,500–$2,000: this is the current entry point for many capable alloy gravel builds. Trek’s Checkpoint ALR 3 Gen 3 sits at the bottom of that range, while the ALR 4 Gen 3 moves toward the top; Canyon’s Grizl AL family is another comparison point. Prioritize tire clearance, low gearing, and real cargo mounts over a nominal component upgrade.
About $2,000–$3,000: this is the broad quality sweet spot for current complete bikes. Trek’s Checkpoint ALR 5 Gen 3, many Salsa Timberjack builds, Surly Disc Trucker, and Kona Sutra LTD all sit in or near this band depending on region and specification. Compare the actual drivetrain range, fork travel, tire clearance, and included racks rather than assuming price alone identifies the best build.
About $3,000 and up: the extra money increasingly buys lower weight, higher-end suspension, electronic or premium mechanical drivetrains, and custom frame options—not automatically better bikepacking fit. Confirm cargo ratings and repairability before paying for carbon or proprietary storage features, and keep enough budget for tires, contact points, bags, and the first service.
One spec that crosses every budget tier: tires matter more than most riders allocate for. On hardtail and rigid setups especially, a quality 29×2.25″ tubeless tire at an appropriate loaded pressure can improve control far more cheaply than changing the whole bike. Schwalbe still lists the G-One Allround in 29×2.25 as a mixed-surface option — check current pricing on Amazon.
Bikepacking Bike FAQs
Match the Bike to Your Real Route
Choosing the best bikepacking bikes for your specific route comes down to one honest question: what does your actual terrain look like, with your actual load? Adventure gravel bikes are the fastest and most versatile platform for mixed routes — but only when specced with adventure geometry and 47mm+ tires, not race builds. Hardtails earn their place the moment singletrack becomes a meaningful part of your route. Rigid setups reward simplicity seekers on remote trips. And touring bikes remain the most capable platform when road mileage and load capacity are the priority, regardless of what the bikepacking community prefers aesthetically. Use the selector near the top of this guide, be honest with your terrain sliders, and stop second-guessing yourself. Once you’ve settled on a frame, the beginner bikepacking guide covers how to spec it up and pack your first loaded trip.
Loaded handling, tire pressure, cargo limits, and component compatibility vary by rider, bike, terrain, and manufacturer specification. Verify the current frame, fork, rack, and tire limits for your exact model, and have a qualified mechanic inspect the loaded setup before a remote trip.