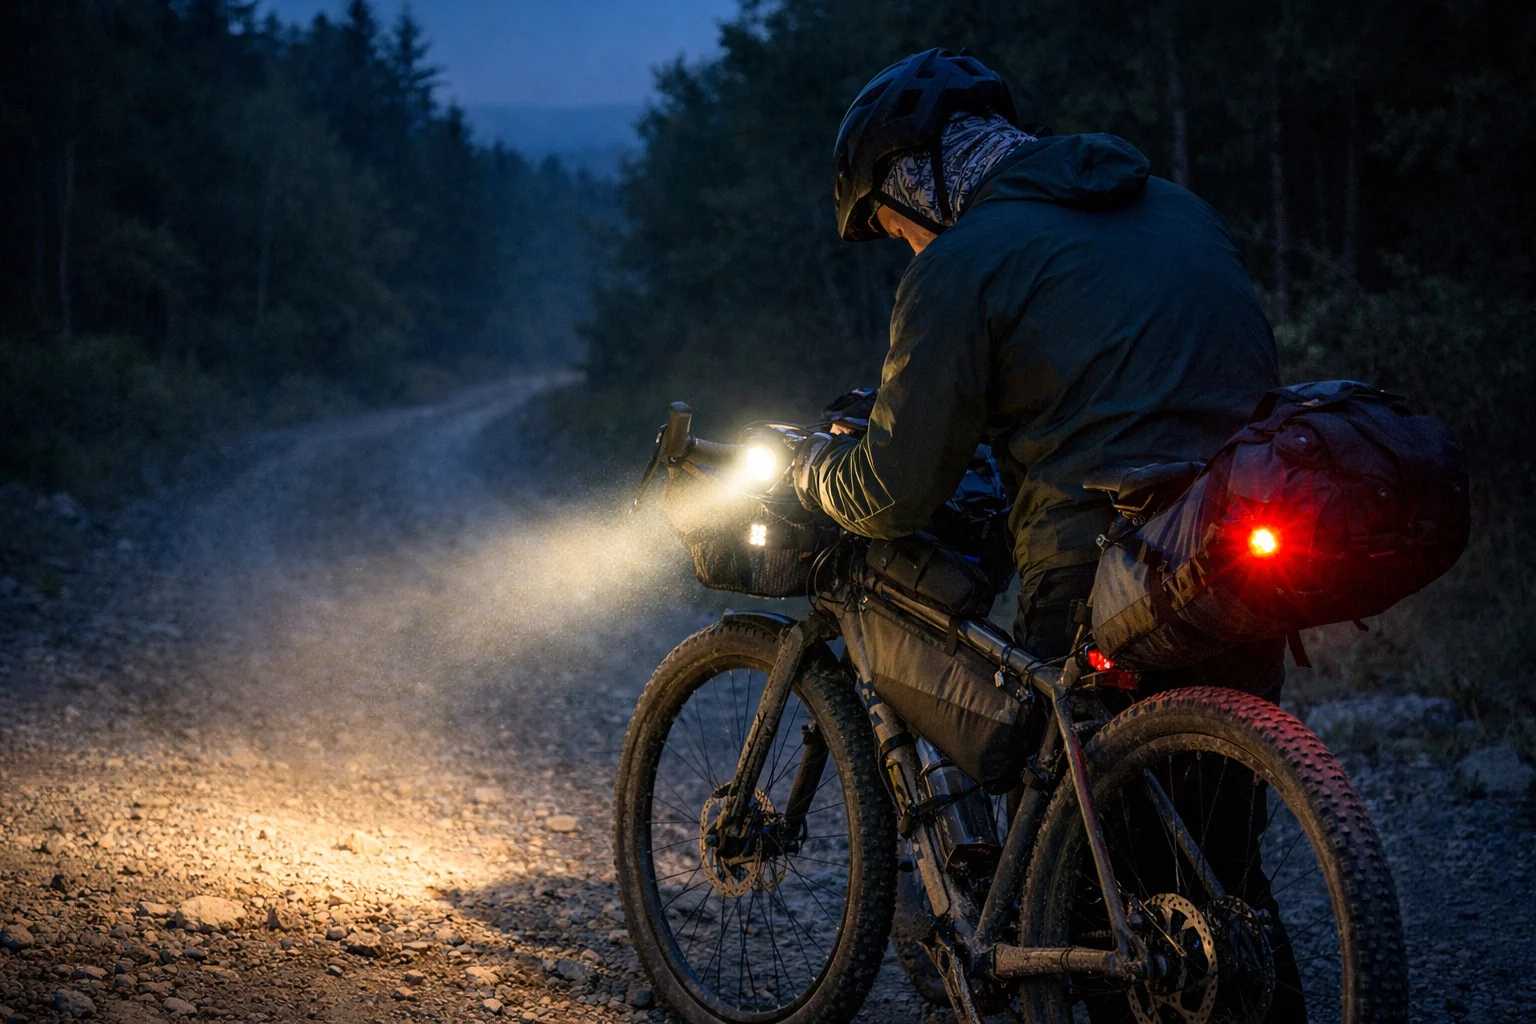
Night riding shouldn’t feel sketchy. The biggest mistake is shopping by peak lumens instead of beam shape, usable runtime, and redundancy. This guide shows you how to choose a front light, rear light, and backup plan for the terrain and night sections you actually ride.
Whether you’re starting before dawn, rolling into camp at dusk, or crossing a long unlit stretch, the right bike lights for bikepacking should let you read the road without burning through the battery. On city paths, washboard gravel, and rough trail, the same failure points keep showing up: harsh hotspots, optimistic runtime claims, and mounts or charging plans that stop working once the bike is loaded. If you’re dialing in the rest of your kit, see the bikepacking gear guide; for a fast answer, use the setup tool.
Updated July 2026: products, runtime, and lighting rules rechecked.
This page contains affiliate links and may include sponsored content. As an Amazon Associate, I earn from qualifying purchases at no extra cost to you. Amazon links are labeled #ad; other affiliate links may be marked as “affiliate link,” “Sponsored,” or “(paid link).” Learn more.
Table of Contents
- Build Your Light Setup
- Quick picks by priority
- Three Rules for a Reliable Lighting Setup
- Why Beam Pattern Matters More Than Lumens
- Minimum Lighting Setup by Riding Environment
- Front lights for bikepacking
- Rear Light Recommendations
- Runtime Reality: Read the Mode Chart, Not the Biggest Number
- Legal Requirements and Regulations
- Charging Strategy for Multi-Day Trips
- Frequently Asked Questions
- Conclusion
Not sure which lights fit your route? Choose three answers to get a front, rear, and backup plan, then compare the matching picks below.
Build Your Bikepacking Light Setup
Choose one answer in each row.
Choose based on your most common night riding: mixed gravel = smooth, readable beam you can hold on medium; remote/technical = the same plus real redundancy (backup front + backup rear, and a helmet light if you’re pushing descents); road-heavy connectors = prioritize rear visibility and awareness (radar helps). Build for steady, sustainable light — not max-lumen bursts.
Quick Picks by Priority
Top 3Default: start with the Ravemen PR1400 for mixed routes. Choose the Lezyne legacy pair only if a bundled micro-USB setup suits you, and choose the Garmin Varia when road-traffic awareness is the priority.
Ravemen PR1400 (DuaLens, USB-C)
If you want one front light that feels “calm” instead of bright-but-stressful, prioritize beam shape and a mode you can actually hold. The DuaLens-style beam spreads usable light close + wide while limiting glare for other road users.
- Best for: gravel/mixed routes where readability and a steady “medium” mode matter more than chasing max lumens
- Format: bar-mounted front light (USB-C; runtime display helps you manage long nights)
Lezyne Macro Drive 1300XXL & Strip Pro (legacy pair)
This older matched pair still gives you a straightforward front + rear bundle, but Lezyne now lists it in its legacy collection. Verify availability and expect micro-USB charging rather than a current USB-C setup.
- Best for: riders who find the older bundle at a sensible price and are comfortable carrying micro-USB
- Format: legacy micro-USB front + rear light pair
Garmin Varia RTL515
If your route includes fast road connectors, what changes the experience most isn’t raw brightness — it’s awareness and predictability. This adds visibility plus earlier notice of approaching cars.
- Best for: road-heavy touring where you want both visibility and earlier notice of cars
- Format: rear light with radar
Quick note: If the PR1400 is overpriced, look for a smooth-beam ~800–1200 lm front you can sustain on medium + a real backup; if you want a true cut-off beam, the Outbound Lighting Detour (official) is the upgrade.
Three Rules for a Reliable Lighting Setup
Choose a smooth beam you can sustain on medium, plan runtime around your longest and darkest stretch, and carry a real backup front and rear. Those three rules matter more than chasing the biggest lumen number, and the sections below show how to apply them.
Why Beam Pattern Matters More Than Lumens
Ever buy a “high-lumen” light and still feel underlit? That’s usually a beam issue: a bright hotspot in the middle, and darkness where the potholes and ruts live. A smoother beam with usable spill often feels brighter — because your brain isn’t constantly guessing what’s in the edges.
Flood vs. Throw: What You Actually Need
Flood beams spread light wide and close. They’re perfect for slow technical sections, tight turns, and anything where you want strong peripheral vision.
Throw beams project light farther down the trail. They shine on faster gravel descents, road connectors, and long straight sections where distance vision matters.
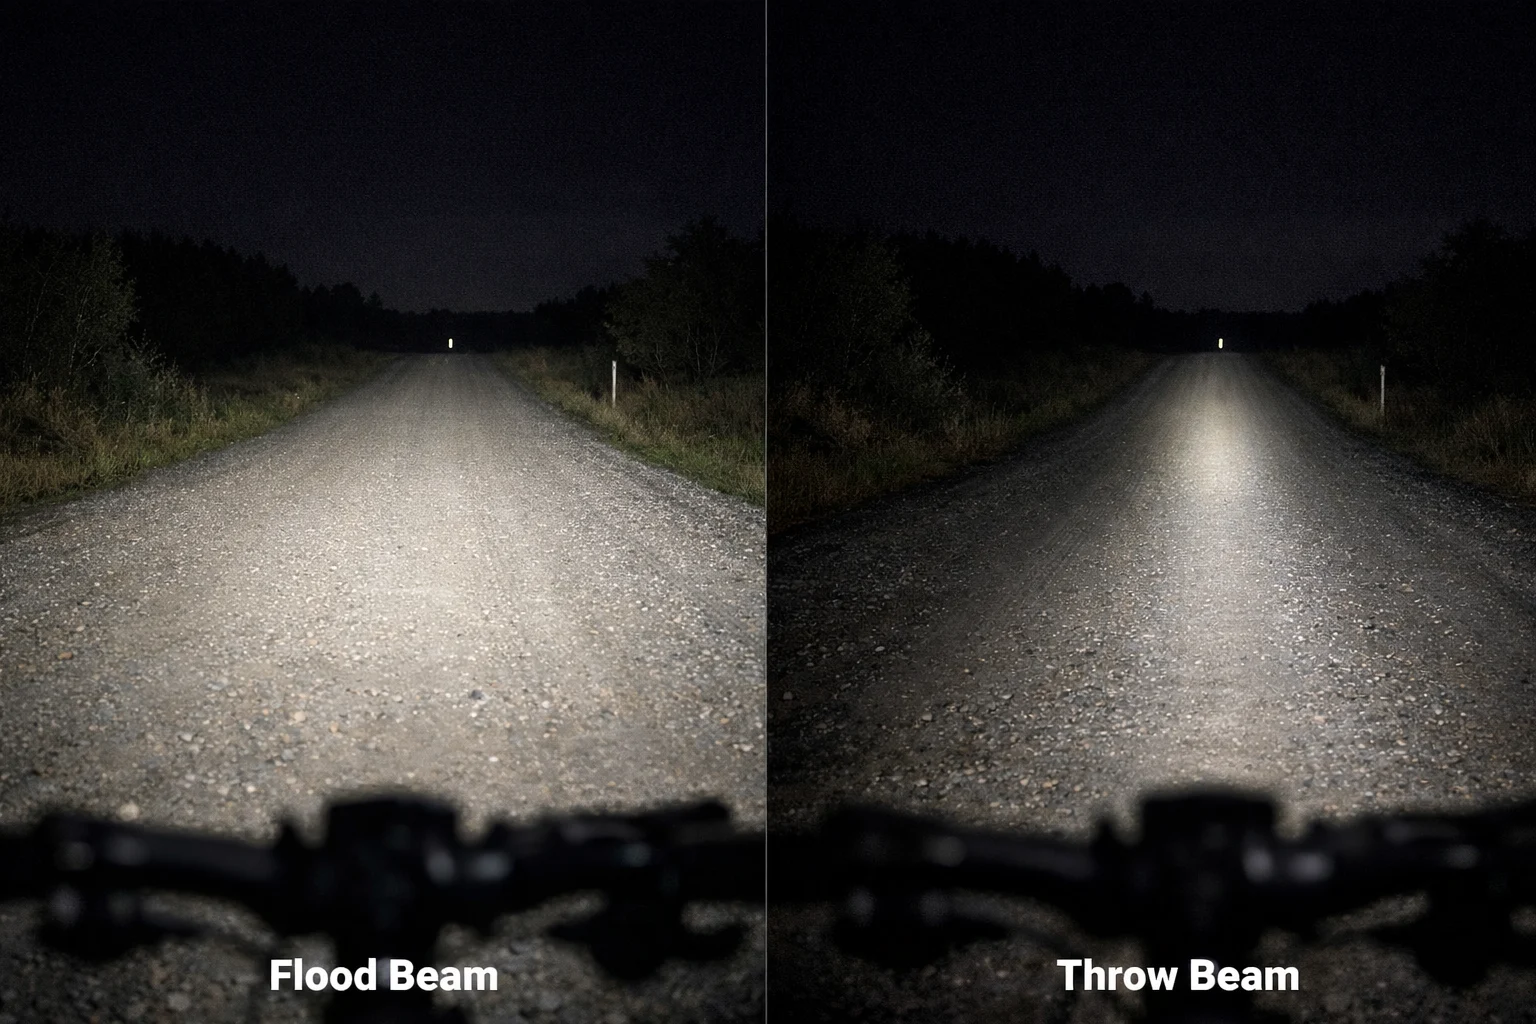
Mixed routes usually want a bit of both: flood for the near field + edges, throw for distance.
The safest-feeling lights weren’t the ones on “max” — they were the ones that made the road feel evenly lit and predictable. If your beam looks like a harsh hotspot + dark edges on a wall test, you’ll feel that on trail.
Minimum Lighting Setup by Riding Environment
Your lighting needs scale with remoteness and terrain. With bike lights for bikepacking, redundancy matters more the farther you are from help. Treat these as common starting points — then adjust for your speed, route tech, and how dark your nights really get.
Note: lumen and runtime numbers vary by mode, beam shape, temperature, and speed. Use these as starting points, then build around the mode you can sustain for your longest night.
Lumens, rear visibility & backup cheat sheet
| Your night riding | Front lumens to have available | Usual beam / mode | Rear priority | Backup |
|---|---|---|---|---|
| Urban / paths | ~400–800 | Low–medium, aimed down for readable pavement without glare | Side visibility plus steady and flash options | Phone light or a tiny clip light |
| Gravel / mixed | ~800–1200 | Steady medium with smooth spill and usable throw | A reliable rear that stays visible around bags | Backup front ~200–400 lumens |
| Remote / technical | ~1000–1500+ | Medium–high; save maximum output for descents and surprises | Main rear plus a second light you can mount anywhere | Backup front + backup rear, or a helmet light |
| Fast descents / rough singletrack | ~1500–2400+ | High when needed, with near-field spill and distance | Keep a visible rear for road connectors | Helmet light strongly recommended + spare rear |
Ready to choose? Jump to Top picks, compare in the front lights table, or grab a system in rear picks. Once you choose a front, the “system win” is adding a reliable rear + a backup you can deploy fast.
Reality check: Peak output matters less than predictable runtime, a stable mount, and a backup light you can deploy quickly.
A practical redundancy pattern: one primary front, one backup front (even small), and two rear options (a main + a tiny clip-on or second rear). If you ride remote, add a headlamp or helmet light that works in camp and can get you moving if the bar light dies. If you already carry a headlamp for camp, test it on your helmet at home. For a simple lightweight option, see Budget visibility + camp backup options.
Budget visibility + camp backup options
If you’re building a simple plan without overbuying gear, separate “ride-by” light from “support” light. The support light is what you use in camp (tent, cooking, repairs), and it also doubles as a true emergency fallback if your main light fails.
- Budget visibility + emergency set: A Cuvccn rechargeable front + rear light set is a solid “be seen / got dark earlier than planned” option — and it’s useful as a backup set. Just don’t treat a ~300 lm front as a fast, unlit-trail headlight.
- Camp + repairs + emergency fallback: A lightweight headlamp like the Nitecore NU20 Classic covers cooking, finding gear, fixing flats, and those “my main light died” moments. Some riders also use a headlamp on their helmet as a directional backup while riding — especially for quick repairs or a slow roll to camp.
Durability & Weatherproofing (IP ratings)
It’s a rough moment when the weather flips and you still have miles to camp. Look for a clearly stated water-resistance rating, and protect charging ports like they’re fragile gear—because they are.
A Practical Bike Lights Setup
One balanced example looks like this:
Primary Front: Ravemen PR1400 (DuaLens, USB-C)
Backup Front: Lezyne Macro Drive 1300XXL (from the pair kit)
Rear (daily): Lezyne Strip Drive Pro 400+ (USB-C)
Rear (road-heavy days): Garmin Varia RTL515
Helmet: Petzl Swift RL (for technical sections)
One-minute setup: Mount your backup light once at home and store it where you can reach it without unpacking. The bikepacking repair kit checklist covers the other roadside essentials.
Front lights for bikepacking
These bikepacking headlight recommendations cover the main use cases rather than pretending one light fits every route. Prioritize beam quality, mounting security, and usable runtime first; weight matters, but reliability matters more on a loaded bike.
Quick gut-check: If your plan includes rough descents or fast gravel, prioritize beam shape and mounting stability before chasing maximum lumens.
Table note: Specs vary by mode and battery age, and many listings bundle multiple versions. Use the “best for” + beam notes as your main filter, and match the exact model name shown. (Front bar lights only — rear picks are in the rear section.)
| Light | Lumens | Runtime guidance | Weight | Beam Pattern | Best For | Where to buy |
|---|---|---|---|---|---|---|
| Ravemen PR1400 (DuaLens, USB-C) | 1400 (claimed) | Varies by mode | ~209 g | Dual-lens style beam (usable spill + reduced glare) | Most gravel/mixed routes (steady “medium” + readable beam) | |
| Lezyne Macro Drive 1300XXL & Strip Pro (legacy pair) | 1300 | Varies by mode | Varies | Focused center beam | Older all-in-one bundle; verify availability and micro-USB compatibility | |
| Cygolite 850-lumen listing (exact variant unverified) | Verify exact model | Verify exact mode chart | Verify exact variant | The official archived Metro 850 and current Metro Plus 800 are different products | Only consider after confirming the exact model and charging connector | |
| Magicshine ALLTY 1500S (removable battery, USB-C) | 1500 (claimed) | Varies by mode | ~153 g | Road-style beam + daytime running light; OLED runtime display; removable battery | Riders who want a removable battery + smart controls; verify current owner feedback before buying | |
| Ravemen PR2400 (high/low beam, USB-C) | 2400 (claimed) | Varies by mode | ~282 g | High beam + anti-glare low beam (more headroom for speed/tech) | Remote/technical routes, faster gravel descents (use max sparingly) | |
| Exposure Strada Mk12 RS AKTIV | 1450 (measured) | 2–36 hours (claimed) | ~203 g | Optimized road beam + strong side spread | Premium splurge (best beam spread feel) |
Important: The exact “Metro Plus USB-C 850” label could not be matched to Cygolite’s current official lineup. Cygolite lists a current Metro Plus 800 and an archived Metro 850 as separate products, so confirm the exact model, lumen rating, and charging connector on the Amazon listing before buying.
Note: Many “families” of lights (like Cygolite Metro / Metro Plus) come in multiple outputs. If you see several lumen options on one listing, pick your model based on your longest night + how fast you descend — not the biggest number on the box.
Mounting Security on Rough Roads
It’s a miserable feeling when you hit washboard and your beam starts pointing at the sky. For bikepacking, favor mounts that don’t creep over time, and consider a secondary light you can move quickly if the primary mount slips.
Decision gate: If your handlebar bag setup forces your light too low, off-center, or partially blocked, an extender is usually the simplest fix. For rough roads, a double-clamp extender is typically more resistant to twisting than a single-clamp style.
A solid fix: BRCOVAN double-clamp handlebar extender (11.81″) — creates a clean mounting zone when bags crowd your bars.
Good for lights, GPS, or a phone mount on loaded setups. Measure your handlebar diameter before ordering, and avoid curved sections for installation.
Why I Recommend the Ravemen PR1400
If you’re trying to pick the best front light for bikepacking, this is a strong “start here” option when you want a beam that stays readable on mixed terrain without living on max power. The dual-lens approach helps keep the near field and edges usable, and the runtime display makes it easier to plan real nights instead of guessing.
- Dual-lens beam that feels more readable than a harsh hotspot
- Runtime display so you can manage long sections without surprises
- USB-C charging for a simpler one-cable routine
- Works best with a backup plan: a small second front + a reliable rear
Quick check: With your bike loaded, do a 10–15 foot “bag block” test. If your handlebar bag cuts into the beam, add an extender or raise the mount.
When the Lezyne 1300XXL Pair Still Makes Sense
This older front + rear bundle can still make sense if you already own it or find the exact pair at a good price. For a new purchase, treat it as a conditional option rather than the default: the front light uses micro-USB, availability varies, and newer systems are easier to standardize around one cable.
- Pros: durable construction, practical output modes, and a matched front + rear bundle
- Cons: legacy micro-USB charging, variable availability, and a more hotspot-heavy beam than smoother modern options
Best use case: keep using a working pair, or choose it only when the exact bundle and older connector fit your charging plan.
Rear Light Recommendations
Rear lights are about being seen. Brightness matters, but so do flash patterns, side visibility, and mounting options that still work when you’ve got a seat bag and straps everywhere.
If you’ve ever looked back and realized your light is blocked by a buckle, you know this is less about specs and more about real placement.
Decision gate: If your seat pack blocks your rear light (or your setup changes day to day), carry a tiny clip-on backup rear light you can mount anywhere.
If you ride road connectors, the Varia is the biggest upgrade; otherwise run one strong main rear + a small backup you can mount anywhere.
Rear picks (3 simple roles)
Main rear (most trips): Lezyne Strip Drive Pro 400+ (USB-C)
Bright, wide visibility, lots of usable modes, and USB-C charging so your “lights kit” stays one-cable simple.
How to choose (so you don’t overbuy): If you mostly ride dirt/gravel, a strong main rear + a tiny backup covers almost everything. If you ride fast road connectors (or busier roads), the Varia is the “stress reducer.” If your seat pack blocks lights often, prioritize a backup that can mount anywhere.
Road connectors upgrade: Garmin Varia RTL515
If you ride fast road stretches, radar awareness is the biggest “stress reducer” you can add. Use it on road-heavy days; keep a simple rear for everything else.
Backup rear (cheap insurance): Cygolite Hotshot Pro 200
Small “second rear” you can move to a rack, bag loop, or wherever stays visible when your seat pack blocks the main light.
Mounting Considerations for Bikepacking
Seatpost mounts can collide with bags. These options tend to work better on loaded bikes:
- Seat bag loops (many bags include light attachment points)
- Rack mounting (stable and visible if you run a rack)
- Helmet rear light as a backup when bag placement is messy
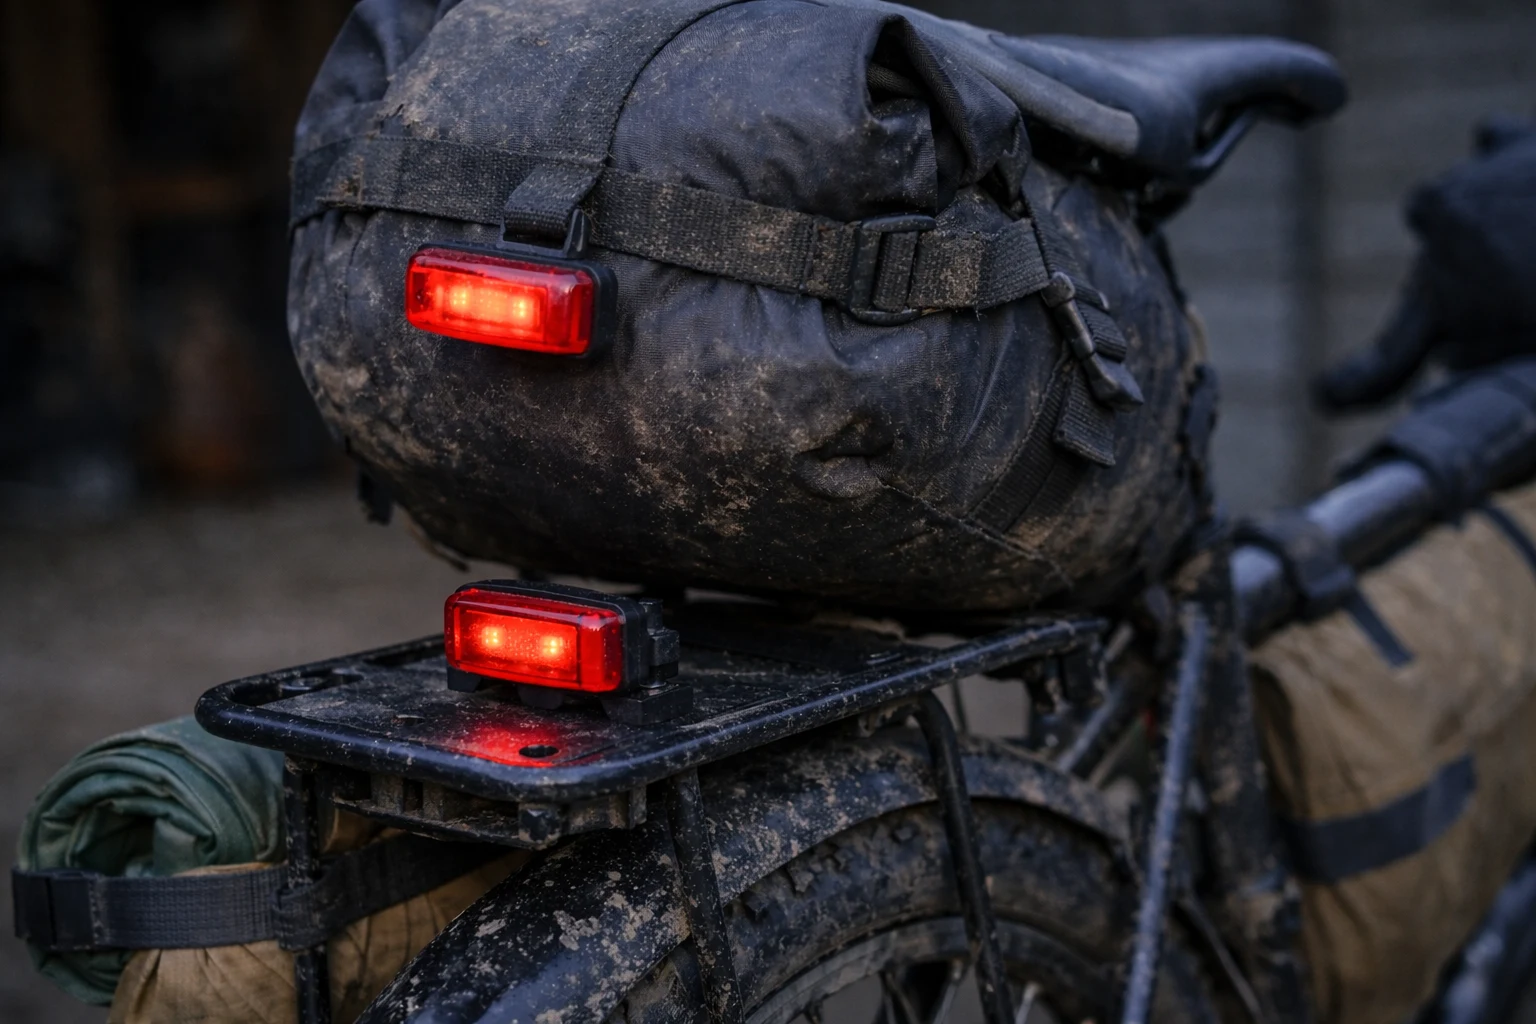
Visibility check: Sit behind your loaded bike and confirm you can see your rear light clearly. If you can’t, drivers won’t either.
Runtime Reality: Read the Mode Chart, Not the Biggest Number
“Maximum runtime” almost always refers to a low-output or flash mode—not the brightness you use to ride an unlit road. For example, Lezyne lists up to 148 hours for the Macro Drive 1300XXL, but its full 1300-lumen mode is rated for 2.5 hours. Compare the exact mode you plan to use, not the headline maximum.
How to Build a Defensible Runtime Plan
- Start with the official mode chart: find the runtime for your likely steady medium or high setting.
- Add a buffer: cold conditions, battery age, stops, and accidental high-mode use can reduce your margin.
- Test your own unit: run the planned mode at home and confirm how quickly its indicator drops.
- Carry a second light: a backup front is more reliable than expecting one battery estimate to be exact.
If a listing gives only one large runtime number without tying it to a mode, treat it as incomplete information and check the manufacturer’s manual before relying on it.
Legal Requirements and Regulations
Lighting laws vary by jurisdiction, so there is no universal steady-versus-flashing rule for every route. Check the competent local authority for each country or state you will ride through, and carry lights with more than one mode so you can comply without changing hardware.
UK Example: What Rule 60 Requires
In Great Britain, Highway Code Rule 60 says that at night a cycle must have a white front light and red rear light lit, plus a red rear reflector and amber pedal reflectors on cycles manufactured after 1 October 1985. Flashing lights are permitted, while a steady front light is recommended on roads without street lighting.
The Department for Transport’s lighting summary adds that a purely flashing lamp must flash at 1–4 equal flashes per second and meet the stated minimum intensity requirement. Those details are UK-specific; do not carry them over to another jurisdiction without checking its current rules.
Official references: Highway Code Rules for Cyclists (Rule 60) and Pedal cycles — lighting.
Before you travel, practice switching your rear light between steady and flash so it’s muscle memory, then use the mode allowed for that route.
Charging Strategy for Multi-Day Trips
Here’s the real problem on multi-day trips: it’s 10 p.m., you’re tired, and the one cable you need is buried in your bag. A tiny charging routine prevents that spiral. This section stays focused on a rechargeable bike light for bikepacking and the power it needs; for the complete phone, GPS, cable, power-bank, and backup system, see the bikepacking power setup guide.
USB-C vs. Micro-USB vs. Proprietary
- USB-C: durable, fast, one-cable life
- Micro-USB: fine if you protect ports and carry a reliable cable
- Proprietary docks: convenient until you lose the cable — risky for remote trips
Power Bank Compatibility
- Charge rate: some lights sip power painfully slowly
- Indicators: battery % or clear LEDs help you plan
- Use-while-charging: handy for long nights or emergencies (test at home first)
One more option for truly long tours: a dynamo hub can reduce charging stress by generating power while you ride. It’s not required, but many long-distance riders like it for reliability.
Helpful tools for charging on tour
A power bank only helps if it is easy enough to pack and simple enough to use every night. Prioritize USB-C in/out, a size you will actually carry, and pass-through charging only when your routine needs it.
Decision gate: If your longest night exceeds the light’s usable medium-mode runtime, carry enough reserve power to cover the gap.
Compact reserve: Nitecore NB10000 Gen II (10,000mAh)
A practical choice when you want one lightweight battery for lights and a phone. Step up to 20,000mAh for repeated long-night charging or several devices.
A 2-pack of 1ft USB-C cables (like the INIU 100W short USB-C to USB-C set) is the tiny upgrade that stops the nightly “where’s my cable?” scramble — especially if you’re charging in a tent vestibule or a café. Two short cables usually beats one long cable that becomes a knot.
Quick pack tip: One cable standard + one spare cable in a small pouch. That’s it. It saves disproportionate frustration.
Frequently Asked Questions
Conclusion
Great lighting is a mix of beam shape, honest runtime, and a backup plan you’ve actually tested. Build your setup around the nights you really expect to ride — then add redundancy if you’re going remote.
If you still need a decision, use the setup tool for a terrain-based answer or jump back to the quick picks for the three simplest routes.
This guide is general education about bike lights for bikepacking, not personalized safety or legal advice. Laws, conditions, and real-world runtime vary (especially with cold, rain, and battery age). If you’re unsure about local requirements or night-riding safety for your route, consult a qualified local bike shop, event organizer, or cycling authority.